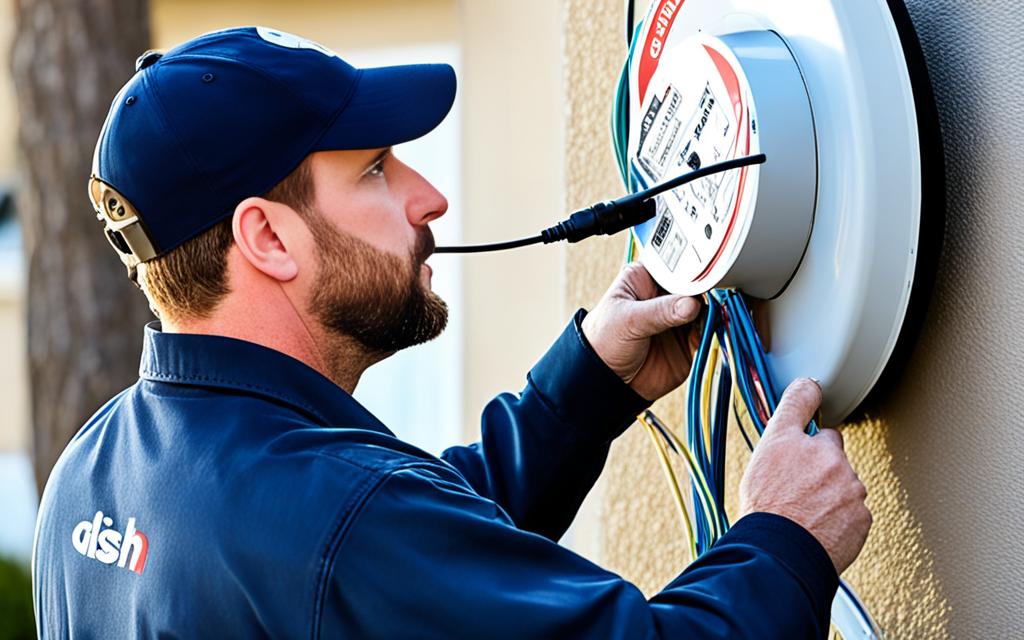
Switching to a new setup on Dish Network is key for getting everything to work right. It makes sure your receiver turns on and connects well with your satellite dish. By doing things the right way and thinking about what matters, you can make your Dish Network better.
Key Takeaways:
DISH Network satellite 129 has been discontinued and programming has been moved to satellites 110 and 1191.
The “Check Switch” process is necessary before activation and when connecting to different satellite dishes1.
Running Check Switch on each receiver in the system is recommended for optimal performance2.
Proper use of DishPro compliant splitters prevents channel loss and black screens2.
Technical interventions, such as cable replacements and equipment repositioning, may be required for heat-related concerns3.
A Check Switch is key for getting the best satellite reception on your Dish Network receiver. It checks if your receiver is picking up the right satellites and fixes any problems with satellite detection. This makes sure your receiver finds all the satellites it needs to show your favorite channels.
When you do a Check Switch, you look at the signal strength and quality of the satellites and transponders. Checking the signal strength helps you see if you need to make changes for better reception. For instance, if you notice signal strength issues on satellite 129, a Check Switch can pinpoint which transponders, like TR 6 and TR 31, need help4.
A successful Check Switch also checks your cables are set up right. It finds any problems with the cables, making sure everything is connected properly. Plus, it fixes any signal errors that might have happened during setup, giving you a smooth viewing experience4.
It’s important to check many transponders for accurate signal strength. Testing different transponders gives you a full picture of your signal strength. This helps you make the right changes for a steady signal on all your channels4.
When doing a Check Switch, your receiver might restart after some steps. This is normal to apply the new settings. It might take a bit, but then you can get back to watching your shows with peace of mind, knowing your receiver is set up right4.
In summary, the Check Switch is a must-do step for Dish Network installations. It makes sure your receiver gets the satellite signals right, fixes satellite detection problems, and checks your cables and signal quality. Doing a Check Switch improves your satellite reception and lets you watch your favorite shows without interruptions.
How to Perform a Check Switch
Doing a Check Switch on your Dish Network receiver is key for getting the best signal and watching without interruptions. It lets your receiver find and check the satellite signals it can get. This makes sure your Dish Network receiver is set up right with the satellites. Here’s how to do a Check Switch:
Turn on your Dish Network receiver and go to the main menu. Click on “System Setup” and then “Installation.”
Find the “Check Switch” option and hit it. Your receiver will start looking for satellite signals.
The first steps might take up to 5 minutes1, depending on your receiver model. Just wait for it to finish.
After the Check Switch is done, your receiver will show a summary. It will tell you if you’re getting signals from the right satellites.
Doing a Check Switch makes sure your Dish Network receiver is set up right with the satellites. This means you get all the channels and shows you want. It’s a must-do if you’ve moved your receiver or if your signal is weak.
During the software download, which can take 5 to 10 minutes1, you might see some issues. Sometimes, you’ll need to restart your receiver, which can take 20 to 60 minutes1. So, doing a Check Switch helps avoid signal problems and keeps your viewing smooth.
It’s also important to wait for your receiver to find a satellite signal after a Check Switch. This can take 5 to 10 minutes1. Giving it time ensures you watch without interruptions.
Having your Dish Network receiver set up right with the satellites means you get the best signal and all channels. Just follow these steps to do a Check Switch and enjoy watching without problems.
Doing a Check Switch on your Dish Network receiver is key for a good signal and watching without breaks. It helps your receiver find and check satellite signals, making sure it’s set up right. Here’s how to do it:
Turn on your Dish Network receiver and go to the main menu by pressing the Menu button on your remote.
Navigate to “System Setup” and select “Installation” to see the installation options.
Find and select the “Check Switch” option. This starts the Check Switch process, where your receiver looks for satellite signals.
The first steps might take up to 5 minutes1, depending on your receiver model. Just wait for it to finish.
After the Check Switch is done, your receiver will show a summary. It will tell you if you’re getting signals from the right satellites.
Doing a Check Switch is key for setting up your Dish Network receiver right with the satellites. This ensures you get all channels and shows. It’s a must-do if you’ve moved your receiver or if your signal is weak.
It is recommended to check several transponders on a satellite to get an accurate signal strength measurement and then average the values4.
By following these simple steps, you can easily do a Check Switch on your Dish Network receiver. This optimizes your signal and ensures a smooth viewing experience.
Troubleshooting Check Switch Issues
If you’re having trouble with the Check Switch, here are some steps to help you. First, make sure all cables are correctly connected between the receiver, satellite dish, and any splitters. It’s key to check these connections well to get a strong signal and fix any problems.
If the Check Switch doesn’t work, check the cables again and try running the test once more. Sometimes, a loose or bad connection can stop the Check Switch from working. By checking the connections and testing again, you might fix the issue and get a successful Check Switch.
If the problem keeps happening and the Check Switch won’t work, call DISH Network customer support for help. Their experts can give you advice and tips for your specific problem, helping you get the Check Switch to work right.
For more help on fixing Check Switch problems and other error codes, check out these resources:
Digital Home Forum – This thread has been viewed over 10K times and has 7 replies from 6 people. The latest comment was on Jul 21, 2008.
Solid Signal Blog – This blog talks about different error codes you might see during the Check Switch, like code 003, 018, 028, 060, and 078.
DISH Network Tech Support – This is an official support page with lots of troubleshooting advice. It covers signal strength, software updates, fixing video receivers, and solving authorization problems.
Getting the Check Switch to work right is key to solving satellite signal issues. By making sure cables are connected well and getting expert help when needed, you can beat any problems and enjoy your DISH Network TV without interruptions.
Switch Installation with Different DishPro LNBFs
When setting up DishPro LNBFs, keep a few things in mind for a smooth installation. The DP21 switch connects up to four satellite feeds to receivers like the Hopper and Joey5. Remember, the DPH42 Switch doesn’t work with a DPH LNBF5.
It’s key to install the DP21 switch right for the best performance. Make sure it’s securely mounted and facing the right way. Use RG-6 cable rated for 2200MHz or higher for a strong signal5. The installation guide’s wiring diagrams will help you connect everything correctly5.
Switches are vital if you want more receivers to work at once or let each watch a different channel. DishPro LNBs and switches work differently, handling multiple satellites at once and switching between them smoothly6. These switches make your system work well without you needing to do much6.
To set up a switch correctly, follow the guide closely. Connect cables from the LNBF to the switch, then from the switch to the power inserter, and finally from the power inserter to your devices5. Always follow safety and grounding steps in the guide for electrical safety and neat cables5.
If you’re having trouble with your DishPro LNBF setup, there are ways to fix it. Try using legacy adaptors or switching to a DP receiver for Dish 3900 compatibility7. DishPro Twin LNBs are another option, but make sure to use RG-6 cable tested to 2150MHz for the best signal7.
Knowing about the different DishPro LNBFs and switches is key to a successful setup. By following the instructions, using the right parts, and grounding properly, you can set up a reliable satellite system. This will improve your entertainment.
For more info on DishPro LNBF switch installation, check the official guide. Or visit AVSForum and DBSTalk for user insights and discussions.
Operating with a DishPro Compliant Splitter
Using a DishPro compliant splitter can boost your Dish Network system’s performance8. These splitters split the signal from a DishPro single LNBF, letting you connect multiple receivers. This way, you can enjoy satellite TV in different rooms. But, remember a few key points for smooth operation and top performance.
Make sure the receiver on the splitter’s passing side is always plugged into a live outlet8. This keeps the DishPro single LNBF powered, sending signals to other receivers. By doing this, you ensure the LNBF gets the power it needs for signal distribution.
DishPro compliant splitters help avoid issues and give you reliable satellite TV8. They work well with Dish Network systems, ensuring efficient signal distribution and little signal loss. Whether you’re adding Joey client receivers, Super Joeys, or Wireless Joeys, these splitters make sure each gets a strong signal.
When using a DishPro compliant splitter, check if your receivers and other gear are compatible9. Dish Network has many receiver models, each with its own needs9. Some models like the DP 111 and 721 work well with DishPro LNBFs without adapters9. But, older systems might need the DISH Pro Adapter for connection10.
Cascading switches can help with satellite signal distribution9. Dish Network has various switches for different needs9. For example, the DP21 and DP34 switches support multiple receivers from one dish setup9. This lets you extend your system for more rooms in your home9.
Bandstacking combines signals onto a single cable, with odd transponders in the 950 to 1450 MHz range and even transponders in the 1650 to 2150 MHz range.
Dish Network offers various receiver features such as Dish 500 compatibility, remote control, electronic program guide, favorite channels lists, parental controls, and alternate language support.
Safety Instructions for Installing the DP21 Switch
When installing and using the DP21 switch, safety should be your top priority. By following the safety instructions in the guide, you can ensure a safe and successful installation.
Here are some important safety guidelines to keep in mind:
Secure Mounting: Make sure the DP21 switch is securely attached to a strong structure. This prevents it from falling or getting damaged during installation.
Proper Cable Usage: Use the recommended RG-6 cable for connecting the DishPro LNBF and the DishPro satellite receiver. This cable is made for outdoor use and ensures a strong signal.
Adhere to Distance Limit: The DP21 switch works best with up to 200 feet of RG-6 cable between the DishPro LNBF and the DishPro satellite receiver. Going beyond this can lead to a weak signal and poor reception.
These safety tips will help reduce the risk of accidents and damage during the DP21 switch installation.
Ensure Quality Signal Reception with DishPro Compliant Splitters
It’s important to use DishPro compliant splitters for the best signal quality. These splitters are made to work well with the DP21 switch. They prevent problems like losing channels, getting black screens, or incorrect Check Switch results.
Always check if the splitter is compatible with the DP21 switch and install it as the manufacturer says. Using the wrong splitters can disrupt the signal and lower performance.
Warranty Coverage for the DP21 Switch
The DP21 Switch comes with a limited warranty for the original user. It covers the purchase price of the switch for one year from the start. The warranty protects against defects in materials or workmanship.
If defects are found, you’ll get a new switch free of charge for parts or labor. Keep your original receipt and follow the manufacturer’s warranty claim process.
Warranty Coverage
Details
Coverage
Defects in materials or workmanship
Duration
1 year from original purchase date
Replacement
Offered at no charge for parts or labor
Following the safety and warranty guidelines will help you get the best from your DP21 switch. Enjoy clear signal reception from your DishPro LNBFs to the DishPro satellite receiver.
“Safety is not an option; it’s a necessity when it comes to installing the DP21 switch. Follow the guidelines, secure the mount, use the correct cable, and enjoy uninterrupted signal transmission from your DishPro LNBFs to the DishPro satellite receiver.”2
Warranty Information and Return Policy
When you buy DISH Network equipment, knowing about the warranty and return policy is key for a smooth experience. DISH Network gives a one-year warranty on their gear, like the DP21 switch, for manufacturing defects11. But, the warranty won’t cover misuse, wrong maintenance, or damage from outside causes12.
If your DISH Network gear has problems, check the warranty details and follow the steps for returns and fixes. Return boxes might take up to 15 business days to get there11. After DISH Network gets and checks the returned gear, they’ll credit your account in seven business days for any charges for gear you didn’t return11.
Accessories like cables or remotes can be returned within 30 days of buying them11. You’ll get a refund for accessories in seven business days after they’re received. Make sure to start the return process for accessories within 30 days to get a refund without trouble11.
You have 30 days from when you bought it to start returning any DISH Network product or gear, like the DP21 switch11. Then, you have another 30 days to send it back. Following these deadlines helps avoid issues with returns and refunds.
For refunds on accessories, DISH Network pays for the product’s original price and taxes. But, they don’t cover shipping and handling fees11. Remember this when asking for a refund for accessories, as you’ll get the product’s price and taxes only, without extra fees.
If you’re having trouble with getting a refund, only the account holder can ask for one from Dish Network. They must contact customer service and could wait up to 60 days for the refund12. If Dish Network won’t give you a refund you think you deserve, you can go to consumer arbitration to solve the problem12.
Knowing about DISH Network’s warranty and return policy helps make sure you have a good experience. Always check the terms and conditions to make smart choices and know how to handle returns, repairs, and refunds.
Expert Support for DISH Network Installations
If you’re having trouble or need help with your DISH Network setup, expert support is just a call away. Solid Signal is here to help with technical support for DISH products and RV satellite activations. Their team knows the ins and outs of installations and can offer solutions to your problems.
Reaching out to Solid Signal’s experts can make your installation go smoothly. They’re ready to help with DISH Network setups, bringing their know-how to customers in need. Whether it’s fixing issues or setting up special features, their team is here to help.
For DISH Network setups, having expert support is key. They know all about DISH products and how to install them right. They can tackle any issues or questions you might have.
Setting up a DISH Network involves aligning the dish, initializing the receiver, and cleaning up after. Solid Signal’s experts will walk you through these steps, making sure your setup is done right and fast.
Experts also offer help with the many features of your DISH Network. They can set up your DVR, navigate through menus, and assist with any receiver settings you’re unsure about.
Using expert support for your DISH Network setup saves time and prevents problems. Their advice and know-how ensure a great installation. This way, you get to enjoy all the features and benefits DISH Network offers13.
Conclusion
Switch installation on Dish Network is key to better satellite reception and a better entertainment experience. By following the right steps for Check Switch and setting up the DP21 switch right, you make sure your receiver gets satellite signals well. This boosts the quality of your favorite shows and movies. It also lets you access more channels and features from Dish Network.
If you run into problems during the switch installation, like fixing check switch issues or figuring out DishPro LNBF compatibility, don’t worry. DISH Network has customer support ready to help you. Their experts can walk you through the setup and offer advice that fits your needs.
Enjoy what your Dish Network service offers, like a wide range of TV channels and On-Demand content. With interactive features and DVR capabilities, you won’t miss any entertainment. Keep connected and enhance your satellite TV experience with a well-installed switch that improves your reception.
FAQ
Why is a Check Switch necessary?
A Check Switch is key for getting your Dish Network to work right. It helps your receiver find the right satellites and lock onto them. This way, you can fix problems with satellite detection and make sure you get all your favorite channels.
How to Perform a Check Switch?
To do a Check Switch, turn on your Dish Network receiver and go to the menu. Then, pick “System Setup” and then “Installation.” Next, choose “Check Switch” and wait for it to finish. After it’s done, you’ll see a report telling you which satellites you’re getting.
What do I do if I encounter issues during the Check Switch process?
If you run into problems with the Check Switch, check your cables first. Make sure they’re all plugged in right, especially between the receiver, dish, and any splitters. If it still doesn’t work, try checking your connections again. If it’s still not working, call DISH Network customer support for help.
How do I install the DP21 switch with different DishPro LNBFs?
Installing the DP21 switch lets you get signals from two DishPro LNBFs to your DishPro receiver. Make sure it’s mounted right and facing the correct way. Use RG-6 cable designed for 2200MHz or higher for the best performance. Follow the setup guide to connect everything correctly.
Can I use a DishPro compliant splitter to split the signal from a DishPro single LNBF?
Yes, you can split the signal with a DishPro compliant splitter from a DishPro single LNBF. But remember, the receiver on the splitter’s passing side needs to be plugged into a live outlet always. This keeps the LNBF powered and sends signals to the other receiver. Always use DishPro compliant splitters to avoid problems.
What are the safety instructions for installing the DP21 switch?
When setting up the DP21 switch, safety comes first. Read the safety guide that came with your system. Make sure the switch is securely attached and use the right RG-6 cable. Following these safety tips will prevent accidents and damage during installation.
What is the warranty coverage for DISH Network equipment?
DISH Network has a one-year warranty for their equipment, including the DP21 switch. It covers manufacturing defects but not misuse, poor maintenance, or damage from outside causes. Always check the warranty and return policy from DISH Network for any issues or concerns.
Where can I get expert support for my DISH Network installation?
If you’re having trouble with your DISH Network setup, get help from experts. Solid Signal offers tech support for DISH products and RV satellite setups. Their team can give you advice and solutions for any installation problems. Contact Solid Signal for a smooth setup.
How can switch installation enhance my Dish Network entertainment experience?
Switch installation is key to getting the best from your Dish Network. By doing a Check Switch and setting up the DP21 switch right, your receiver will get satellite signals well. If you have issues, contact DISH Network support or experts for help. Enjoy your Dish Network and the shows it brings home.
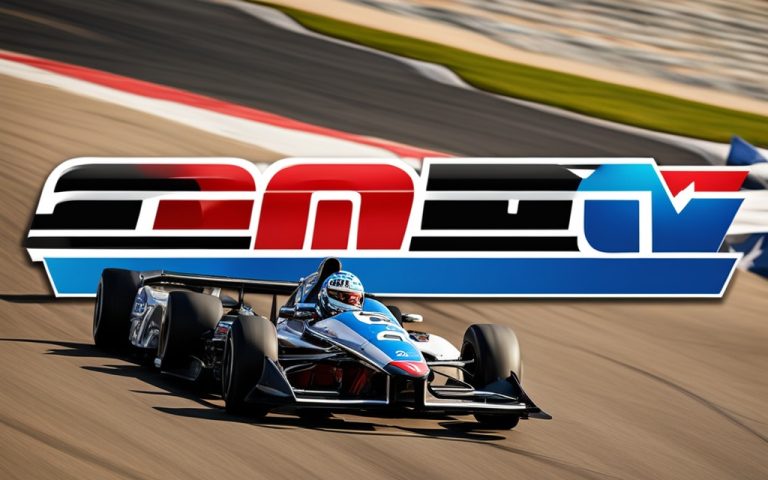
MAVTV is a top TV channel that brings exciting motorsport action and exclusive highlights. It also offers original docuseries and more. Dish Network subscribers can watch their favorite racing events…
For small companies, having a well-designed network is key for smooth operations and growth. Planning and implementing a network redesign are vital for efficiency, productivity, and keeping up with digital…
WHOOP makes it easy to connect and integrate with different networks. This helps users improve their fitness and track their performance. With many options, users can pick the best network…
Political networks link people, groups, and organizations in the political world. They shape policy and affect political outcomes1. These networks grow through working together and sharing resources. This helps information…
Before you go to a networking event, make sure you’re ready. Know what to bring and how to make the most of it. These events are great for meeting professionals…
When you see “A start job is running for Raise network interfaces” during network setup, it can be a real problem. It stops you from connecting to the network. We’ll…