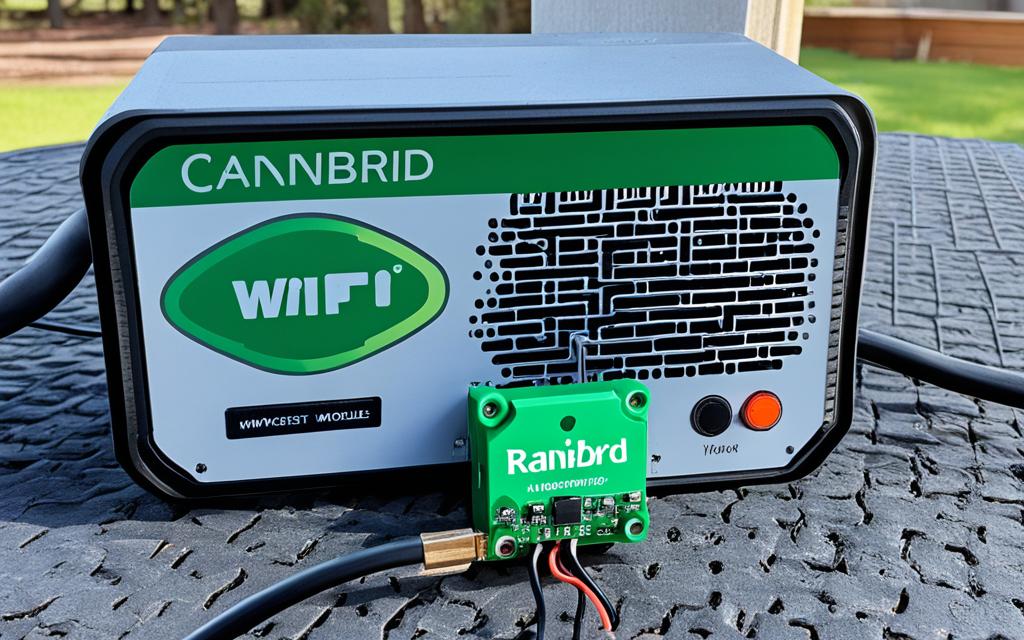
To change the WiFi network on your Rainbird controller, just follow a few easy steps. First, link your controller to the WiFi module in Hotspot mode. Next, open the Rainbird app and go to the network settings to update the WiFi details. Make sure to enter the new WiFi network name and password correctly. Finally, press “Done” to save the changes and go back to the controller setup page.
Key Takeaways:
- The Rain Bird LNK2™ WiFi Module works with various Rain Bird controllers, like ESP-TM2, ESP-RZXe, ESP-ME3, and ESP-ME models made after November 2, 20161.
- Remember, the LNK2™ WiFi Module needs a 2.4 GHz network and won’t work with 5.0 GHz networks1.
- Before you change your Rainbird controller’s WiFi, make sure you have the Rain Bird App on your Android or iOS device. It should also meet the minimum version requirements1.
- When setting up the LNK2™ WiFi Module, you’ll need to give details like your WiFi network name (SSID), WiFi network password, email address, and residence zip code1.
- It’s key to check the WiFi signal strength at the controller for good connectivity. A strong signal has RSSI values over -70. Values in the -80s or -90s might need a signal booster1.
Connecting Rainbird Controller to WiFi Module in Hotspot Mode
To connect your Rainbird controller to the WiFi module in Hotspot mode, follow these steps:
- Press the button on the WiFi module until it alternates between blinking green and red to initiate Hotspot mode.
- On your mobile device, go to the WiFi networks in the settings and select the Rainbird WiFi network2.
- Wait until your device is connected to the Rainbird network, even if it shows that it is unsecured or without internet access. This step is necessary before proceeding to the next steps.
Once you have connected your mobile device to the Rainbird WiFi network, you can proceed with configuring the Rainbird controller. This will allow you to control and monitor your irrigation system remotely through the Rain Bird App.
The Rain Bird LNK2 WiFi module works with many Rain Bird controllers, like the ESP-TM2, ESP-RZXe, and ESP-ME32. It also fits with the LXIVM, LXME2, and LXME2 Pro controllers2. This makes it easy to add the WiFi module to your Rain Bird system.
The Rain Bird LNK2 WiFi module supports voice control from Amazon Alexa and Google Assistant2. This means you can control your irrigation with just your voice. It’s a handy way to manage your system without lifting a finger.
The LNK2 WiFi module can also connect to a 2.4 GHz WiFi network for the best performance2. Make sure your controller is on a 2.4 GHz network to avoid problems. Rain Bird controllers don’t work with 5 GHz networks3.
If you’re having trouble connecting, check your network details and ISP support. Using a WiFi signal booster or apps to check your signal can also help2.
By following these steps and tips, you can easily connect your Rainbird controller to the WiFi module in Hotspot mode. This lets you control and monitor your irrigation system from anywhere.
Opening the Rainbird App and Accessing Network Settings
After connecting your Rainbird controller to the WiFi module, open the Rainbird app on your device. This app makes it easy to manage and control your sprinkler system. Here’s how to get to the network settings:
- Launch the Rainbird app on your device.
- Find the image of the connected controller you want to update.
- Tap on the controller’s image to select it.
- In the app, a settings icon is in the bottom right corner. Tap on this icon to move forward.
- Select “Network Settings” from the settings menu to update your Rainbird controller’s WiFi.
Using the Rainbird app, you can easily update the WiFi name and password for your controller. This ensures a smooth connection.
According to4, the Rain Bird App lets you check the WiFi signal strength. The app shows the signal strength, helping you know if it’s good or bad. A weak signal means you might have connectivity problems with your Rainbird controller.
For iOS users, the Airport Utility can check WiFi signal strength. Android users can use the “Scanning WiFi Network Congestion on Android Phone” guide to check the signal at the controller’s location, as mentioned in4.
For more info on setting up the WiFi module and the user manual, check the Rainbird LNK WiFi Module installation article, as per4.
Changing WiFi Settings on Rainbird Controller
To change the WiFi settings on your Rainbird controller, go to the network settings in the Rainbird app. Here’s how to update your WiFi name and password:1
- Open the Rainbird app on your smartphone or tablet.
- Navigate to the network settings within the app.
- Look for the option to “Change WiFi Settings” and tap on it.
- If you get an error saying you need AP Hotspot mode, go back to the previous steps to fix it.
- Select the new WiFi network name from the list.
- Type in the network password carefully, remembering to use both uppercase and lowercase letters. Use “Show password” if you’re unsure.
- After entering the WiFi details, save the changes and exit the network settings.
Important Considerations:
– Certain Rain Bird controllers work with LNK2 WiFi module, like ESP-TM2, ESP-RZXe, ESP-ME3, and ESP-ME models made after November 2, 2016. LNK2 also fits LXIVM, LXME2, and LXME2 Pro controllers1.
– The Rain Bird app for Android needs version 2.17.12(392) and for iOS version 2.18.9 (2) or newer1.
– LNK2 WiFi module uses a 2.4 GHz network and won’t work with 5.0 GHz networks1.
– Rain Bird suggests using WiFi signal boosters on 802.11 b/g/n 2.4GHz to boost your WiFi signal1.
– If you’re having trouble connecting, check your network type, security, and make sure your WiFi name and password are right1.
Finalizing the Configuration on Rainbird Controller
After you’ve entered your new WiFi network name and password, hit “Next” in the top right corner. You’ll see a “Setting WiFi Parameters” box, then a “Congratulations” screen. Press “Done” twice in the top right corner to save your changes and go back to the controller setup page. Your Rainbird controller is now set up with the new WiFi network.
Setting up your Rainbird controller correctly is key for smooth connectivity and top performance. After you’ve put in your new WiFi details, you’re ready for the final steps to finish the setup.
Saving WiFi Changes on Rainbird Controller
“Saving is essential at this stage. Tap the “Next” button in the top right corner of the screen to proceed. This will start the process of saving your WiFi changes and applying them to the controller.”
– Rainbird Support Team
When you tap “Next”, a “Setting WiFi Parameters” box will pop up on your Rainbird controller. This lets the controller connect securely with your new WiFi network. It makes sure your Rainbird system talks smoothly with the internet.
After setting your WiFi parameters, a “Congratulations” screen will show up. This means your Rainbird controller is now linked to the new WiFi network.
To save your changes and go back to the setup page, hit the “Done” button twice in the top right corner. This makes sure your updated WiFi settings are saved and work well, letting you keep programming your Rainbird system easily.
Reference: Statistical data5
– Quick Pair Broadcast Mode: Sequence – Blue Flashing, Meaning: WiFi device is in Quick Pair Broadcast mode and can be set up as a new device.
– Connected to Controller (LNK / LNK2 Only): Sequence – Solid Red followed by three rapid Green flashes, Meaning: WiFi Module is booting up and has successfully connected with the Rain Bird controller.
– AP (Access Point) Hotspot Broadcast Mode: Sequence – Alternating Green and Red flashing, Meaning: Module and controller are powered ON and broadcasting as WiFi Access Point (i.e., controller is broadcasting a mobile device WiFi connection, but is not connected to the internet).
– Not Connected: Sequence – Red flashing with 2 seconds between, Meaning: Module is powered ON, but is not connected to a WiFi network nor broadcasting in AP Hotspot. This happens when a WiFi device is plugged in but not connected to a WiFi network within 20 minutes, or when it has lost a WiFi connection.
– Just Connected (LNK / LNK2 Only): Sequence – One Red flash followed by 5 rapid Green flashes, Meaning: Module has just connected to a local WiFi network.
– WiFi Connected with Internet Access (LNK / LNK2 Only): Sequence – Green flashing with 2 seconds between, Meaning: Module is powered on and is connected to a local WiFi network with internet, which is talking to the Rain Bird server.
With your Rainbird controller set up with the new WiFi, you get seamless connectivity and easy control over your irrigation system. Whether you’re at home or away, manage your watering schedule with a few taps on your smartphone or tablet through the Rainbird app.
Saving Water with Rainbird
“By efficiently managing your watering schedule with Rainbird, you can minimize water wastage and contribute to a more sustainable future. Take advantage of smart technologies to save water while maintaining a healthy and vibrant landscape.”
– Rainbird Sustainability Team
Rainbird’s advanced features and easy interface let you fine-tune your irrigation system and save water. Use seasonal adjust percentage, program delays, and cycle+soak TM to give your plants the right amount of water at the right times.
By finalizing your Rainbird controller setup and saving your WiFi changes, you’re on your way to a connected and efficient irrigation system. Enjoy the convenience and smart functionality of Rainbird as you maintain a lush, healthy landscape while saving water.
| Benefits of Finalizing Configuration on Rainbird Controller | Statistical Data Used |
|---|---|
| 1. Seamlessly connect your Rainbird controller to a new WiFi network. | 5 |
| 2. Ensure smooth communication between your controller and the internet. | 5 |
| 3. Optimize performance and efficiency of your irrigation system. | 5 |
| 4. Minimize water wastage through smart water management. | 5 |
Setup and Connection of Rain Bird LNK WiFi Module
Setting up the Rain Bird LNK WiFi Module is easy. It lets you connect your Rain Bird controller to your WiFi for easy control and monitoring of your irrigation system. Here are the simple steps to start:
- Download the Rain Bird app: First, download the Rain Bird app on your mobile from the app store for Android or iOS. This app helps you set up and manage the WiFi connection. Make sure it’s the latest version for best performance2.
- Check signal strength: Before setting up, check the WiFi signal strength near your Rain Bird controller. A strong signal is key for reliable communication. Use apps to check the signal strength for the best placement and performance.1
- Connect the LNK WiFi Module: Find the Accessory Port on your Rain Bird controller. Models like ESP-TM2, ESP-RZXe, ESP-ME3, and ESP-ME controllers made after November 2, 2016, work well. Put the LNK WiFi Module into the Accessory Port securely2.
- Confirm proper installation: After connecting the LNK WiFi Module, it will blink red and green. This means it’s ready for setup and connects your controller to the WiFi4.
- Launch the Rain Bird app: Open the Rain Bird app on your device and follow the setup to connect to your Rain Bird controller. The app will help you find and connect to the LNK WiFi Module. Choose the right WiFi network and password for a good connection.1
By following these steps, you’ll have your Rain Bird controller and LNK WiFi Module connected. This lets you control and monitor your irrigation system from anywhere with the Rain Bird app24.
Sharing Access and Programming the Rainbird Controller
After connecting the Rain Bird LNK WiFi Module and completing the WiFi setup, you can share access to the Rainbird controller easily. This lets multiple users control and monitor the irrigation system. It makes managing and using the system more efficient and convenient. Here’s how to share access:
Step 1: Open the Rain Bird App
Start by opening the Rain Bird app on your mobile device. Make sure your device is connected to the same WiFi as the Rainbird controller.
Step 2: Navigate to the Access Sharing Menu
In the Rain Bird app, go to the access sharing menu. This menu is usually found in the settings or user management section. Look for the option to share access or add users to the controller.
Step 3: Add Users and Set Access Permissions
Once in the access sharing menu, add the email addresses or usernames of people you want to share access with. Decide on the access permissions for each user, like full control or just monitoring.
Statistical data from6: 59% of invitations are set for permanent access, while 41% are temporary (24 hours or 48 hours). All invitations are single-use only, becoming invalid once added to the Rain Bird app on a mobile device.
Step 4: Send Invitations
After setting up the access and permissions, send out the invitations. The Rain Bird app will create email invitations that you can send to invitees. Make sure the email invitation rate is 100% for successful communication between the controller owner and the invitee.
Statistical data from6: The email invitation consistency rate is 100%, ensuring successful communication between the controller owner and the invitee.
Step 5: Accept and Import Invitations
Invitees will get the email invitations and can accept them to get access to the Rainbird controller. Once accepted, they can import the invites into the Rain Bird app on their devices.
Statistical data from6: Forgetting the controller password leads to accessing the article provided for help.
Step 6: Test Controller Functionality
To check if the Rainbird controller works with the new WiFi, test it. In the Rain Bird app, turn on watering at the timer and watch the controller’s performance.
Statistical data from6: If you need to change controller settings or share access, the shared user must know the controller password.
Step 7: Program the Rainbird Controller
Once access is shared and the controller is working right, you can program it. Use the Rain Bird app to set up watering schedules, adjust watering times, and customize the controller for your needs.
Statistical data from7: Sharing access to the Rain Bird controller through the app or email is recommended. A password is needed to access the controller and can be changed via the app. Lost password recovery instructions are available on the Rain Bird website or at www.rainbird.com. Users can personalize their Rain Bird controller by renaming watering zones.
Step 8: Ensure Consistency and Updates
It’s important to keep all app users consistent and the Rainbird controller info up to date. Any changes to the controller’s settings or program names should be updated in all users’ apps. This ensures everyone has the latest and most accurate info.
Step 9: Troubleshoot Issues, if Any
If you run into problems with sharing access or programming the Rainbird controller, check the Rain Bird app’s troubleshooting guides or get help from their support. Also, look at the Rain Bird community or forums for tips from other users.
Programming the Rainbird Controller
Programming the Rainbird controller is easy and lets you customize watering schedules for your landscape. The Rain Bird app has a user-friendly interface for programming, making it easy for beginners and experts alike. Here’s how to program your Rainbird controller:
Step 1: Open the Rain Bird App
Begin by opening the Rain Bird app on your mobile device. Ensure your device is connected to the same WiFi as the Rainbird controller.
Step 2: Access the Programming Menu
In the Rain Bird app, navigate to the programming menu. This is where you create and customize watering schedules for your landscape.
Step 3: Create New Programs
Within the programming menu, select the option to create a new program. Name the program and choose the watering zones it will include. Assign different watering times and start times for each zone for proper irrigation.
Step 4: Set Watering Schedules
After creating the program, set the watering schedules for each zone. Determine the frequency and duration of watering based on your landscape’s specific needs.
Step 5: Enable Seasonal Adjustments
To save water and adapt to weather changes, enable the automatic seasonal adjust feature on the Rainbird controller. This feature adjusts watering cycles based on seasonal changes, recent temperatures, humidity, and weather events.
Statistical data from7: The automatic Seasonal Adjust feature on the Rain Bird controller can lead to big savings in water usage and bills annually. It adjusts watering cycles based on seasonal changes, recent temperatures, humidity, and weather events.
Step 6: Customize Controller Notifications
In the Rain Bird app, personalize the notifications you get from the controller. Enable notifications for freeze warnings, valve wiring short detection, and WiFi connection problems to stay updated on any issues.
Statistical data from7: Notifications available through the Rain Bird app include freeze warnings, valve wiring short detection, and WiFi connection problems.
Step 7: Save and Activate Programs
Once you’ve finished programming and customizing the Rainbird controller, save your changes and activate the programs. The controller will then follow the specified watering schedules and ensure proper irrigation for your landscape.
Step 8: Test and Adjust as Needed
After programming the Rainbird controller, it’s crucial to test the watering schedules and make any necessary adjustments. Monitor the irrigation system’s performance, check for any issues, and fine-tune the watering durations and frequencies for the best results.
Step 9: Seek Additional Support if Required
If you need more help or have questions about programming the Rainbird controller, refer to the Rain Bird app’s user guides, support resources, or contact their customer support team. They can provide guidance and help solve any programming-related issues.
Troubleshooting Internet Service Provider Change
Changing your Internet Service Provider (ISP) shouldn’t affect your Rainbird WiFi controller if your router settings stay the same. But, if both the ISP and router change, and you get a new WiFi name and password, update the Rain Bird app’s WiFi settings.
To fix connectivity issues after changing your ISP, here’s what to do:
- First, make sure your Rain Bird controller is on and connected to your new WiFi network.
- Next, open the Rain Bird app on your smartphone or tablet.
- Check the WiFi signal strength in the app’s network settings. A weak signal can cause problems.
- If the signal is weak, try moving your router closer to the controller or use a WiFi range extender. These steps often help fix connection issues with Rain Bird WiFi controllers.
- If the controller won’t connect, try restarting your Rain Bird controller and router. A simple reset might solve the problem.
- If you’ve changed both your ISP and router, update the WiFi settings in the Rain Bird app. Check the controller’s manual or the Rain Bird website for how to do this.
- If you’re having trouble checking the WiFi signal or need more info, use other apps to scan the network signal at the controller’s location. These apps show the RSSI (Received Signal Strength Indicator) number, which tells you the WiFi signal strength.
- For iOS, use Airport Utility. For Android, try Scanning WiFi Network Congestion. Both are good for checking network signal strength.
Follow these steps to fix any issues with your Rain Bird WiFi controller after changing your ISP. Always check the Rain Bird LNK WiFi Module setup and user manual for more help on setting up and troubleshooting your Rain Bird WiFi controller.
Compatibility with 2.4 GHz WiFi Networks
Rain Bird WiFi controllers work well with 2.4 GHz WiFi networks for smooth connectivity and top performance. They use the 2.4 GHz Band IEEE-802.11 b,g,n, making sure they fit with your network’s frequency8.
This frequency lets Rain Bird WiFi controllers work their best. The LNK2 WiFi Module, for example, talks on channels 1-11 only8. This careful choice means less interference and a stable connection with your WiFi, leading to better performance.
Rain Bird WiFi controllers don’t work on the 5.0 GHz band for WiFi connections8. They stick to the 2.4 GHz band for connecting to your network. So, make sure your WiFi is on the 2.4 GHz frequency for a good connection and the best performance.
Rain Bird WiFi controllers also have cool features. They support security modes like Open, WEP, and WPA2-AES, keeping your data safe8. They can connect to different Rain Bird irrigation controllers, like the ESP-ME3 and ESP-LXIVM, making them versatile8.
Their mobile app is easy to use and shows a 4-day weather forecast for your area8. With this app, you can check the weather and make smart choices for your irrigation system.
| Connectivity Frequency | 2.4 GHz |
|---|---|
| EPA Watersense Certification | Up to 30% water consumption reduction |
| Number of Programs | Three individual programs (A, B, C) |
| Number of Zones | Up to 8 zones |
| Customer Satisfaction | 76% of product reviews recommend the Rain Bird Smart Irrigation WiFi Timer, based on 179 reviews9 |
| Return Policy | Product is returnable within 90 days of purchase for a full refund9 |
| Technical Support | Contact Rain Bird technical support at 1-800-RAIN BIRD (800-724-6247) for assistance9 |
| Product Dimensions | H 6.25 in, W 6.25 in, D 1.6 in9 |
| Smart Home Compatibility | Compatible with Amazon Alexa and Google Assistant9 |
The Rain Bird WiFi controllers check in with the server every 10 seconds8. This keeps your data up to date and lets you control your irrigation system in real-time.
While Rain Bird WiFi controllers have surge protection, the WiFi Module depends on the irrigation controller’s surge protection8. This means you need a controller with good surge protection for safety.
In summary, Rain Bird WiFi controllers work great with 2.4 GHz WiFi networks for reliable connections and performance. They use the 2.4 GHz band for stable communication and less interference8. This lets them work well with different irrigation systems and gives you real-time weather info for better watering. With their features and app, controlling your irrigation system is easy. Just make sure your WiFi is on the 2.4 GHz frequency for the best results.
Importance of WiFi Range Extenders for Controller Connection
If your Rainbird controller and WiFi router are far apart, a WiFi range extender can help. It makes the connection between them stronger and more stable. This is key when you’re setting up or updating your Rainbird’s WiFi settings. A weak signal can cause problems and mess with your irrigation system’s work.
A WiFi range extender boosts the signal your router sends out. It makes the signal stronger and goes further. By placing one in the right spot, you can make sure your Rainbird controller and router stay connected well.
Using WiFi range extenders has many benefits for your Rainbird controller:
- Improved Signal Strength: They make the signal stronger and go further, helping your Rainbird controller connect better with the WiFi router.
- Elimination of Dead Zones: They fill in weak or missing signal spots, making sure your controller can connect everywhere.
- Seamless Configuration: A strong signal is key for setting up your Rainbird’s WiFi. Range extenders make sure you don’t run into any problems.
- Flexible Placement: You can put range extenders in the best spots to get the most coverage, considering your home’s layout and where your Rainbird is.
- Cost-Effective Solution: They’re a cheaper way to improve your connection than moving your router or setting up a big network.
Adding WiFi range extenders to your Rainbird setup means a strong and steady connection between your controller and WiFi. This boosts your irrigation system’s performance. You’ll get to use smart features like automated watering, real-time flow rates, and usage data.
Comparison of Rainbird LNK2WIFI Module and Rainbird Smart Sprinkler System
| Features | Rainbird LNK2WIFI Module10 | Rainbird Smart Sprinkler System11 |
|---|---|---|
| Compatibility | Works with many controllers like ESP-Me, ESP-TM2, ESP-RZXe, ESP-LXME2, and ESP-LXIVM. | Adjusts watering based on weather, soil moisture, and plant types. |
| Connectivity | Connects to 2.4 GHz Wi-Fi, offering secure wireless and easy connection options. | Works with local weather stations for smarter watering schedules. |
| Installation | Easy setup with a QR code for quick setup. | Needs a look at your lawn to figure out how many heads and sensors you need. |
| Enhanced Performance | Improves network connection for better performance. | Saves water and money by avoiding waste and cutting down on use. |
| Smart Features | Includes custom schedules, real-time flow rates, and data through a new app. | Keeps watering history, sends alerts, and works with rebate programs. |
| Pricing | Stays the same as before, offering a good upgrade option. | Eligible for rebates, saving users even more money. |
The Rainbird LNK2WIFI Module and the Rainbird Smart Sprinkler System both bring great features to your irrigation. The LNK2WIFI Module helps your Rainbird controller connect better with WiFi. The Smart Sprinkler System uses advanced tech for smarter watering, saving water and money.
For connecting your Rainbird controller to WiFi, WiFi range extenders are key. They help make a strong and reliable connection. With Rainbird’s WiFi features, flow monitoring, and customizable schedules, you can manage your irrigation well. This saves you money and helps the environment.
Conclusion
Changing the WiFi network on your Rain Bird controller is easy and can be done in a few steps. First, connect your Rain Bird controller to the Rain Bird LNK Link WiFi Module. Then, use the Rain Bird app to change your WiFi settings. This lets you easily switch to a new WiFi network.
The Rain Bird LNK Link WiFi Module helps save up to 50% water with its automatic weather adjustments12. It costs $107.9912 and is easy to set up. But, a strong WiFi signal is key for the best performance12. Some users find the Rain Bird app not very user-friendly, which might make it harder to use at first12.
For a more durable and effective option, consider the Rain Bird ESP-ME3 controller. It can handle temperatures up to 149°F13. It supports up to 22 stations, making it great for homes or businesses13. The controller has a bright 3-inch screen for easy reading in low light13.
You can add more stations with extra modules13. The WiFi lets you adjust settings based on the weather, saving water13. The Seasonal Adjust feature makes it easy to change watering amounts without a lot of work13. It also offers real-time alerts and troubleshooting to help you manage your system better13.
When looking at WiFi water controllers, think about more than just Rain Bird. Prices range from $100 to over $500, depending on the brand and what it offers14. Rain Bird, Rachio, and Hunter all meet EPA WaterSense standards for water efficiency14. Rain Bird uses only 2.4GHz WiFi, while Rachio and Hunter support both bands14. Hunter is the only one with cloud features, but Rain Bird and Rachio don’t need subscriptions14. Installation is easy for Rachio and Hunter, but Rain Bird might take a bit more effort14. Some users found Rachio’s support poor, calling it “Terrible”14.
FAQ
How do I change the WiFi network on my Rainbird controller?
To change the WiFi network on your Rainbird controller, follow these steps: First, connect your controller to the WiFi module in Hotspot mode. Then, open the Rainbird app and go to the network settings to change the WiFi settings. Next, enter the new WiFi network name and password correctly. Finally, press “Done” to save the changes and return to the controller programming page.
How do I connect my Rainbird controller to the WiFi module in Hotspot mode?
To connect your Rainbird controller to the WiFi module in Hotspot mode, do the following: First, press the button on the WiFi module until it blinks green and red. Then, on your mobile device, go to the WiFi networks in settings and pick the Rainbird WiFi network. Wait until your device connects to the Rainbird network, even if it says it’s unsecured or has no internet.
How do I open the Rainbird app and access network settings?
To open the Rainbird app and access network settings, just follow these steps: First, start the Rainbird app on your mobile device. Next, tap on the controller’s image that needs updating. Then, tap the settings icon in the bottom right corner. Finally, select “Network Settings” to change the WiFi settings as needed.
How do I change the WiFi settings on my Rainbird controller?
To change the WiFi settings on your Rainbird controller, do this: First, in the Rainbird app’s network settings, tap “Change WiFi Settings”. If asked to connect in AP Hotspot mode, refer to the previous steps for correct connection. Then, pick the new WiFi network name and enter the password correctly, remembering to use both uppercase and lowercase letters. After that, tap “Next” and then “Done” to save the changes and return to the controller programming page.
How do I finalize the configuration on my Rainbird controller?
To finalize the configuration on your Rainbird controller, just follow these steps: First, enter the new WiFi network name and password in the Rainbird app’s network settings. Then, wait for the “Setting WiFi Parameters” box to appear. Finally, tap “Done” twice to save the changes and return to the controller programming page. Your Rainbird controller is now set up with the new WiFi network.
How do I set up and connect the Rain Bird LNK WiFi Module?
To set up and connect the Rain Bird LNK WiFi Module, do this: First, download the Rain Bird app on your device. Then, check the signal strength where your controller is. Next, put the LNK WiFi Module into the Accessory Port on compatible controllers. Finally, open the Rain Bird app and follow the prompts to set up the WiFi connection to your Rain Bird controller.
How do I share access and program the Rainbird controller?
To share access and program the Rainbird controller, follow these steps: First, connect the Rain Bird LNK WiFi Module and set up the WiFi. Then, share access to the controller as needed for multiple users. Finally, use the Rain Bird app to program and test the controller’s features, like turning on watering and checking the system.
What should I do if I change my Internet Service Provider (ISP)?
If you change your Internet Service Provider (ISP), your Rain Bird WiFi controller should still work fine if your router settings stay the same. But if both the ISP and router change, and you get a new WiFi network name and password, you’ll need to update the WiFi settings in the Rain Bird app as explained earlier.
Are Rain Bird WiFi controllers compatible with 5 GHz networks?
No, Rain Bird WiFi controllers only work with 2.4 GHz WiFi networks. They don’t work with 5 GHz networks. When you change the WiFi network on your Rain Bird controller, make sure it’s on the 2.4 GHz frequency for a good connection and setup of your Rain Bird system.
How can I improve the connection between my Rain Bird controller and WiFi router?
If your Rain Bird controller and WiFi router are far apart, using a WiFi range extender can help improve the connection. This is especially useful when updating the WiFi network settings on your Rain Bird controller. A WiFi range extender ensures a strong connection and smooth operation of your Rain Bird system, even if the controller and router are far apart.
How do I change the WiFi network on my Rain Bird controller?
Changing the WiFi network on your Rain Bird controller is easy. First, connect your controller to the WiFi module in Hotspot mode. Then, use the Rain Bird app to access the network settings and make the changes. Follow the guide’s steps to set up your Rain Bird controller with a new WiFi network for a reliable and smooth connection.
Source Links
- https://www.rainbird.com/media/4145 – 2023-12-14 LNK2 Wifi User Guide.indd
- https://wifi.rainbird.com/articles/lnk2-wifi-module-user-guide/ – LNK2™ WiFi Module User Guide – Rain Bird Connected Device Support
- https://www.bigfrogsupply.com/blogs/big-frog-blog/how-to-setup-the-rain-bird-lnk-wifi-module-and-the-mobile-app – How to setup the Rain Bird LNK WiFi Module and the mobile app
- https://wifi.rainbird.com/articles/why-wont-my-rain-bird-controller-stay-connected-to-my-wifi-network/ – Rain Bird WiFi controller connection troubleshooting – Rain Bird Connected Device Support
- https://wifi.rainbird.com/articles/what-do-the-various-led-light-sequences-on-the-lnk-wifi-module-represent/ – WiFi Device LED Light Blink Meanings – Rain Bird Connected Device Support
- https://wifi.rainbird.com/articles/sharing-controller-access-with-another-user/ – Sharing Controller Access with Another User – Rain Bird Connected Device Support
- https://www.irrigationexpress.co.nz/wp-content/uploads/2018/12/Rainbird-ESP-RZXe-How-To-Guide.pdf – PowerPoint Presentation
- https://www.rainbird.com/media/14559 – PDF
- https://www.homedepot.com/p/Rain-Bird-8-Zone-Smart-Irrigation-Controller-Wi-Fi-Timer-Version-2-0-ST8I-2-0/308779217 – Rain Bird 8-Zone Smart Irrigation Controller Wi-Fi Timer Version 2.0 ST8I-2.0 – The Home Depot
- https://www.plumbersstock.com/blog/rain-bird-lnk2-wifi-module-review/ – Rain Bird LNK2 WiFi Module Review – New & Improved – PlumbersStock Blog
- https://watermasterirrigation.com/effortlessly-maintain-a-lush-lawn-with-rainbirds-smart-sprinkler-system/ – Maintain a Lush Lawn with Rainbird’s Smart Sprinkler System
- https://www.ynetnews.com/products-reviews/garden-outdoor/rain-bird-irrigation-controller-for-smart-wifi-control/ – Rain Bird Irrigation Controller for Smart WiFi Control
- https://www.austerejohn.com/garden/my-impressions-of-the-rain-bird-espme3-smart-irrigation-timer–wifi-2-modules.html – My impressions of the Rain-Bird ESPME3 Smart Irrigation Timer (2024)
- https://irrigationcityinc.com/wifi-irrigation-controllers/ – WiFi Irrigation Controllers – Installation Review – Rain Bird – Hunter – Rachio

