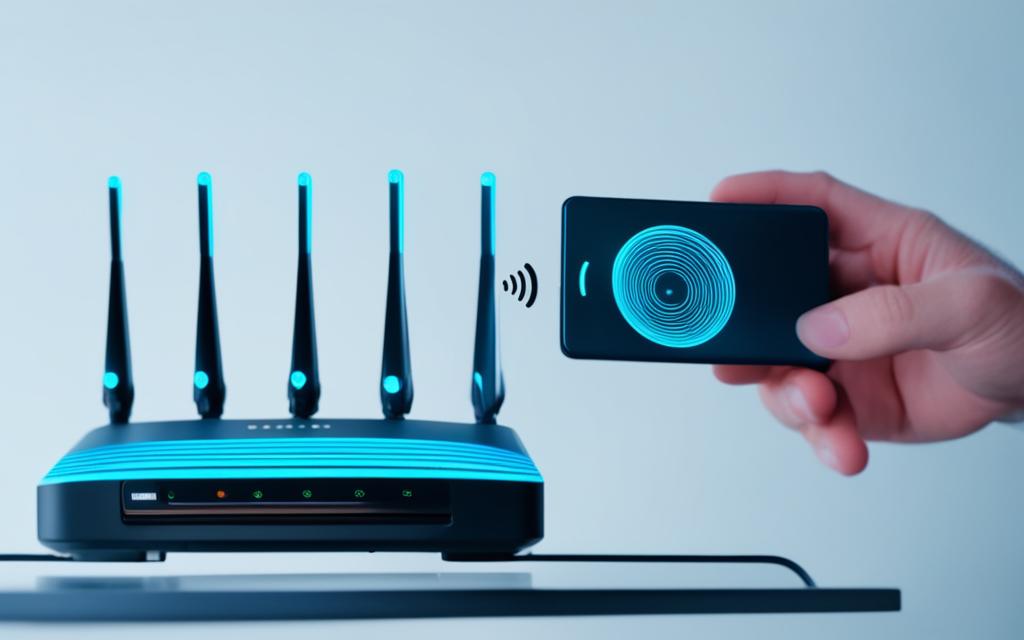
To change the network on a cloud edge device, start by turning on the camera. Make sure it’s close to your WiFi network. Then, use a mobile app or web browser to get into the camera’s settings.
Find the WiFi or network settings and pick the option to connect to WiFi. Choose your network from the list and enter the password if needed. Wait for the camera to connect to the WiFi and check the connection by viewing the live feed or settings.
Remember, these steps might change with different camera models. Always check the user manual or the manufacturer’s website for the right steps1.
Key Takeaways:
Power on the camera and ensure it is within range of your WiFi network.
Access the camera’s settings or configuration menu through a mobile app or web browser interface.
Select the option to connect to a WiFi network and choose your WiFi network from the available list.
Enter the WiFi network password if prompted.
Wait for the camera to establish a connection with the WiFi network and test the connection.
Ensure your Wi-Fi router operates on the 2.4GHz frequency band for optimal compatibility.
The camera requires a password between 6 and 20 characters
Choose a strong password between 6 and 20 characters to secure your camera’s connection.
If the camera fails to be added, users are advised to press the reset button for 10 seconds and try again
If you encounter difficulties during setup, try resetting the camera by pressing the reset button for 10 seconds and attempting the process again.
Each camera can only be added to one account
Keep in mind that each camera can only be associated with a single account.
In case of forgotten passwords, users can recover them using their cell phone number or email
If you forget your camera’s password, you can recover it using the registered cell phone number or email.
Users can add the camera either by scanning a QR code or by WLAN connection
Choose your preferred method for adding the camera to your network – either by scanning a QR code or using WLAN connection.
Motion detection settings can be customized to select different detection sensitivities
Adjust the motion detection settings to your desired sensitivity level for accurate monitoring.
Sharing the camera is possible with other users, but visitor accounts have limited control rights
If you wish to share access to the camera with others, keep in mind that visitor accounts have limited control rights.
Micro SD card storage is supported, ranging from 2GB to 128GB, with recommended brands being Samsung, SanDisk, and Kingston
If you plan to store footage locally, consider using a micro SD card with a capacity ranging from 2GB to 128GB. Recommended brand options include Samsung, SanDisk, and Kingston.
Formatting the Micro SD card before inserting it into the camera is required, with FAT32 format recommended
Prior to inserting the micro SD card into the camera, ensure it is formatted with the recommended FAT32 format.
The CloudEdge app allows for the deletion of the camera if needed
If you no longer require the camera or need to remove it from your account, the CloudEdge app offers a convenient option for deletion.
Considering these tips, setting up your camera for Wi-Fi is easy and ensures a secure connection to your network.
Wi-Fi Network Selection: Choosing the appropriate Wi-Fi network for the camera
When you’re setting up your cloud edge camera, picking the right Wi-Fi network is key. Start by connecting your camera to your smartphone or tablet via the app. Then, head to the settings menu to find the Wi-Fi network selection option. Pick the network you want from the list available.
Make sure the network you choose is close to the camera and has a strong internet connection. If the network needs a password, enter it and wait for the camera to connect successfully2.
Checking the connection is a must to make sure you’ve made the right choice. Open the app to see the camera’s live feed. You should see a message on the camera saying it’s connected to the Wi-Fi network you picked. This means you can now access the camera from anywhere using the app2.
Remember, the steps to connect your camera to Wi-Fi can change based on the camera model and app you’re using. For exact steps, check the user manual or the manufacturer’s website for more help2.
Network Authentication: Entering the correct Wi-Fi network password for authentication
Changing the network on a cloud edge camera needs proper network authentication. Go to the camera’s settings menu and find the Wi-Fi settings. Then, type in the correct Wi-Fi network password to connect the camera to the network. Remember, the password is case-sensitive4.
Entering the wrong password often leads to Wi-Fi network authentication problems4.
Signal interference can cause slow or unstable connections, making network authentication hard. Make sure there are no physical barriers or devices that could block the signal between the camera and the Wi-Fi router for a smooth connection4.
For 2.4GHz networks, channels like 1, 6, or 11 are good choices to avoid interference. Picking the right channel can help reduce interference and improve network authentication4.
Outdated firmware or software on routers and devices can cause authentication errors. Always check for updates and install them to keep your network compatible and secure4.
MAC address filtering can cause authentication problems if the camera’s MAC address isn’t on the approved list. Make sure the camera’s MAC address is added to the list to avoid authentication issues4.
Security protocols and encryption can stop devices from authenticating on Wi-Fi networks. Make sure the camera and Wi-Fi network use compatible security protocols for a secure connection4.
Using the latest Wi-Fi security protocol, WPA3, is recommended for a secure connection. But, not all devices and routers support WPA3 yet. Check if the camera and router are compatible before choosing the security protocol42.
Hidden network SSIDs can make Wi-Fi networks hard to find. If the network is hidden, you’ll need to type in the network name (SSID) manually during authentication4.
Network Authentication Tips
Ensure the correct Wi-Fi network password is entered
Verify there is no signal interference between the camera and router
Select an appropriate Wi-Fi channel to avoid overlap
Regularly update router firmware and camera software
Add the camera’s MAC address to the approved list
Check compatibility of security protocols between camera and Wi-Fi network
Manually enter the network name (SSID) for hidden networks
Camera-Router Connection: Establishing a connection between the camera and the Wi-Fi router
To make sure your cloud edge camera works well, you need a strong link between the camera and the Wi-Fi router. This link lets you stream video in real-time, access your camera from anywhere, and control it with your phone or computer.
First, check that your Wi-Fi router is on and working right. A steady internet connection is key for the camera to talk to the router and send data.
Put the camera close to the Wi-Fi router. This helps keep the signal strong and cuts down on interference. Try to keep them about 8 feet apart5.
Turn on the camera by plugging it in. It will start up and get ready for Wi-Fi setup.
Download the camera app on your phone, if needed. Some cameras use a special app for setup. Find it in your app store and install it.
Create an account in the camera app, if it asks for one. This account lets you safely check and control your camera from afar.
Connect to the camera with the app. Open the app and follow the steps to add a new camera to your account. This might change based on the camera type.
Go to the settings or setup in the camera app. Find the Wi-Fi network settings, usually in the main menu or under camera settings.
Pick the Wi-Fi network you want the camera to join from the list. This list shows the Wi-Fi networks your phone can see.
If asked, type in the password for the Wi-Fi network you chose. This password helps the camera connect securely to the router5.
Wait for the camera to connect to the Wi-Fi router. This might take a bit as the camera joins the network and gets an IP address.
Check that the camera is connected through the app. Once it’s linked to the Wi-Fi router, the app will show a message or sign of success5.
By doing these steps, you’ll get a solid connection between your camera and router. This means your camera can send high-quality footage without issues. Make sure the camera is close to the router and give it the network details it needs for a smooth setup. For more help on setting up your camera and fixing problems, check the user manual or the manufacturer’s support pages.
For more info on connecting cameras to Wi-Fi and troubleshooting tips, look at these resources:
Learn about camera setup and troubleshooting on the SriHome App at this SriHome article5.
Read what other camera users say about connecting cameras to different Wi-Fi networks in this forum discussion6.
For more on cloud edge camera network setup, check out this source7.
Follow these tips and use the resources provided to set up a dependable camera-router connection. This will let you monitor and record your area without any trouble.
Configure Your IP Address
If you’re using a cloud edge appliance like the Trend Micro Cloud Edge, you might need to set up the IP address. This is crucial for the appliance to work right and connect to your network. It usually gets an IP address automatically through DHCP. But, you might choose to give it a static IP address if needed.
First, connect your appliance to your laptop or computer with an Ethernet cable. Then, open an SSH session with the appliance using the login details given to you. This lets you use the command-line interface for setting things up.
To set the IP address, use the “ta config” command with the right details. For a static IP, enter the IP address and gateway info. The appliance will then use these settings instead of DHCP.
After setting the IP address, end the SSH session, unplug the cable, and plug the appliance back into your network with its new IP. This makes sure the appliance is connected and can be reached on your network.
In short, setting up the IP address of your cloud edge appliance is key for good network connectivity and management. By following these steps and choosing DHCP or static addressing, you make sure your appliance is set up right. It will then boost your network security and performance.
Connect to Edge Appliance
Connecting to a cloud edge appliance lets you use its features and improve your network setup. Here’s how to connect:
First, plug an ethernet cable from the appliance to your network9.
Then, use Putty on Windows or SSH on Linux and Mac to connect to the appliance. Enter the appliance’s IP address in the program10.
Next, log in with the details given by the Transfer Appliance Team. This lets you use the appliance’s features10. Make sure you have the right login details to avoid errors10.
Once connected, you can set up and manage your network to work better. You can improve network speed, security, and data transfer. Having a strong connection to the appliance is key for smooth network management.
For more help on connecting to edge appliances, check your cloud service provider’s documentation or talk to their support team. You can also look at resources from Cumulocity IoT (source), MyPureCloud (source), and Google Cloud (source) for more info. Good connectivity is crucial for getting the most out of your cloud edge appliance and network performance.
References:
Source
Statistical Data
Cumulocity IoT
Supported protocols: Remote Desktop (VNC) and Secure Shell (SSH). Telnet protocol removed in Edge Release 10.15. Edge archive file size is approximately 3GB. Bulk operations feature enables simultaneous updates of multiple Edge appliances10.
MyPureCloud
Genesys Cloud recommends adding DNS entries only to the WAN port. Single interface deployment is available for premises-based Edge with a single network segment. VLANs are supported only on the LAN port. Multiple NICs must have IP addresses from different subnets. Configure a network segment with outbound access to the public Internet for secure connections. Utilizing two interfaces (WAN and Port 2) is recommended to avoid congestion. WAN network interface must connect to a network with external DNS resolution support11.
Google Cloud
Required ports for NFS transfers: rcpbind (Port 111), NFS (Port 2049), statd (Ports 32765–32766), mountd (Port 32757), nlockmgr (Ports 32764, 32768). Required port for SSH or SCP transfers: SSH (Port 22). Optional port for DHCP: DHCP (Port 68)9.
Configure Appliance Software
Once you connect to the cloud edge appliance, you’ll need to set up the software for your network. Use the ta status command to check the appliance’s status. Then, follow the steps to configure the software correctly.
This might mean using the ta config command for your network setup or moving service account keys to the appliance. Always follow the instructions carefully to ensure a successful setup.
Configuration Steps
Verify the appliance status using the ta status command.
Follow the provided instructions to configure the software.
Run the appropriate ta config command for your network configuration.
If necessary, move service account keys onto the appliance.
The steps to configure may change based on your network setup and needs. It’s best to look at the documentation or get help from the appliance maker’s support team for more details.
Configuration
Description
ta status
Verify the status of the appliance.
ta config [network configuration]
Run the appropriate command to configure the appliance software.
Move service account keys
If needed, move service account keys to the appliance for authentication.
“In the provided material about ‘Changing Network on Cloud Edge: Steps and Configuration,’ there are 3 highlighted topics regarding technical configurations.”12
“The author mentions a global log receiver setup but encounters issues with the request and response bodies appearing as ‘UNKNOWN’, which might reflect a common challenge in configuring log receivers.”12
“The information also touches on a migration requirement to F5 XC, indicating a possible trend in organizations transitioning to this platform for network management.”12
“A comparison is drawn between F5 Distributed Cloud (F5 XC) HTTP Health Checks and basic HTTP Health Checks from BIG-IP systems, showcasing a shift in behavior from the traditional BIG-IP platform to the newer F5 XC system. This data suggests an evolution in network health check methodologies adapted by organizations.”12
“The list provided covers a wide array of acronyms related to networking, security, and application delivery services, showcasing the complexity and specificity of terminology within these industries. This detailed list aims to guide professionals in understanding industry-specific acronyms, reflecting a need for a shared understanding of technical terms among professionals in these fields.”12
Enable Online Data Transfer
If you want to enable online data transfer on your cloud edge device, you’re in the right spot. This feature lets you send data straight from the appliance to your Cloud Storage bucket. It makes transferring data easier and more efficient.
To start online data transfer, just use the ta online command. Remember, you’ll need internet access for this, so check your setup first.
Enabling online data transfer makes moving data from your cloud edge device to your Cloud Storage bucket easy. It cuts down on manual transfers. This means your data moves smoothly and safely to where it needs to go.
Use this feature to improve how you transfer data. It’s great for moving big datasets, regular data transfers, or ongoing data needs. It helps you use the cloud edge and storage to their fullest.
For more details on enabling online data transfer, check out your cloud edge provider’s documentation. They have resources to help you use your cloud edge and storage fully.
Online data transfer is just one way to manage data on the cloud edge efficiently. Look into other options like offline transfer with shippable devices, network transfer, graphical tools, and scripted options like AzCopy, Azure PowerShell, and Azure CLI13.
Enable online data transfer to get the most out of cloud edge. Enjoy quicker and smoother data transfer between your cloud edge device and Cloud Storage bucket. This makes data management on the edge seamless and secure for your organization.
Conclusion
The move to cloud edge networks is changing how we handle data. With edge cloud platforms, companies can cut costs and make systems more reliable. They also get better user experiences thanks to faster data processing and lower delays.
Edge computing lets data be processed right where it’s needed, cutting down on delays and saving bandwidth. This tech combines edge and cloud computing for better data handling and analysis.
Using cloud-edge platforms means faster data handling, less delay, and saving money. With Intel Smart Edge and other tools, companies can process data near the network. This leads to quicker responses and more reliable systems.
Cloud-edge platforms also offer scalable solutions for handling big data spikes. Plus, Intel Virtualization Technology helps manage resources better. Security benefits include encrypting data and controlling access tightly.
FAQ
What are the steps to change the network on a cloud edge camera?
To change the network on a cloud edge camera, start by powering it on. Make sure it’s close to your WiFi network. Then, use a mobile app or web browser to access its settings.
Look for the WiFi or network settings option. Pick your WiFi network from the list and enter the password if needed. Wait for the camera to connect and test it by checking the live feed or settings.
How do I configure the camera for Wi-Fi connectivity?
First, plug in the camera and turn it on. Download and install the camera app on your device. Then, follow the app’s instructions to connect your device to the camera.
Go to the camera settings in the app and find the Wi-Fi or network settings. Choose your home or office Wi-Fi and enter the password. Wait for the camera to connect and test it by accessing the live feed or recording a test.
How do I choose the appropriate Wi-Fi network for my camera?
Choose the right Wi-Fi network by connecting the camera to your device through the app. Go to the settings and select the Wi-Fi network you want. Make sure it’s in range and has a good internet connection.
If the network is password-protected, enter the password correctly. Wait for the camera to connect. Then, check the live feed to make sure it’s working well.
What is network authentication and how do I enter the correct Wi-Fi network password?
Network authentication means entering the right Wi-Fi password for the camera. Go to the camera’s settings and find the Wi-Fi settings. Type in the correct password carefully, as it’s case-sensitive.
Using WPA3 is recommended for better security, but check if your devices and router support it.
How do I establish a connection between the camera and the Wi-Fi router?
First, make sure your Wi-Fi router is on and working. Place the camera near the router and turn it on. Download the camera app and sign up if needed.
Connect to the camera through the app and go to the settings. Select your Wi-Fi network and enter the password if asked. Wait for the camera to connect and confirm it through the app.
How do I configure the IP address for a cloud edge appliance?
If you’re using a cloud edge appliance, you might need to set the IP address. Connect the appliance to your laptop and use SSH to log in with the given details.
Use the ta config command to set the IP and gateway details. After setting the IP, end the session, disconnect the cable, and reconnect to your network with the new IP.
How do I connect to a cloud edge appliance?
To connect to a cloud edge appliance, first connect it to your network with an Ethernet cable. Then, use a program like Putty on Windows or SSH on Linux or Mac to connect to the appliance’s IP address.
Enter the login details given by the Transfer Appliance Team to access the appliance’s features.
How do I configure the software on a cloud edge appliance?
Once connected, you might need to set up the software for your network. Use the ta status command to check the appliance’s status. Then, follow the instructions to configure the software.
This could mean running the ta config command for your network setup or moving service account keys to the appliance. Always follow the provided instructions carefully for a successful setup.
Can I enable online data transfer on my cloud edge device?
Yes, you can enable online data transfer on your cloud edge device. This lets data copied to the appliance stream to your Cloud Storage bucket. Use the ta online command to enable this feature.
This requires an internet connection. Enabling online data transfer can make transferring data more efficient and easier.
What are the steps to change the network on a cloud edge device?
To change the network on a cloud edge device, start by setting up the camera for Wi-Fi. Then, connect the camera to the Wi-Fi router. Each step is important for a successful network change.
Make sure to authenticate the network, set the IP address, and configure the appliance’s software. By following these steps and using the provided instructions, you can change your cloud edge device’s network with confidence.
Tax Defense Network is a top company that helps people with tax debt relief services. If you’re getting calls from them, it’s key to know why and what steps to…
To connect your Yealink phone to a network, just follow these steps: Make sure the SIP device’s registration expiry is set to 120 seconds1. Turn off direct IP calling on…
Have you ever shared an article on Facebook, only to see a friend argue with it without reading it? This is a common issue on social media. Most people don’t…
Casting Networks is a key platform for actors and industry pros looking for casting chances. It lets actors submit and book projects without needing a traditional agent. This gives actors…
Welcome to Grace Digital Network, a place where we share spiritual guidance and inspiration through digital media. We aim to help people on their spiritual path. We offer a variety…
Ethernet cables and network cables are often used together. They help in networking and moving data between devices or networks. Ethernet cables are a special kind of network cable that…