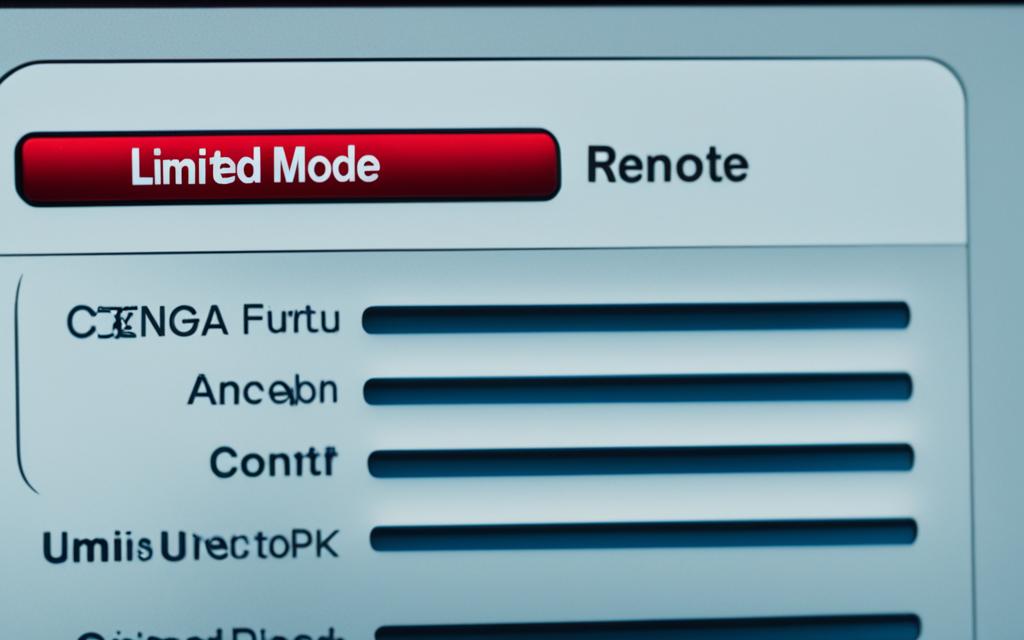
To change the input on your Dish Network remote, just follow these easy steps. Many users111,21,3) say the process changes with your remote’s model. Start by pressing the Menu button, then go to Settings and Remote Manager.
Next, disable Limited Mode and save your changes. After that, hit the clear TV button to open the TV menu. Finally, use the Input button to switch between channels.
Another way is to press the TV button, then the SAT button while seeing an error message. This makes the INPUT button work for changing inputs. But remember, these steps might not work for all remotes. Always check the Dish Network support or user manual for your remote’s exact steps.
Key Takeaways:
Changing the input on a Dish Network remote may vary depending on the model.
One method involves navigating to Settings and Remote Manager to disable Limited Mode and access the TV menu.
Another technique involves pressing the TV button and then the SAT button to change inputs.
For specific instructions, consult the official Dish Network support or user manual.
Limited Mode on Dish Network remotes helps users keep their TV on the right channel. It stops accidental changes to other channels. By turning on Limited Mode, users make sure their TV stays on DISH programming. This is great for those who like a simple viewing experience without changing inputs often.
Setting up Limited Mode on Dish Network remotes is easy, depending on the remote type. Older remotes use “Regular Limited Mode,” while newer ones have “Easy Limited Mode.” Both keep the TV on the preferred channel but have different setup steps.
Regular Limited Mode: For older remotes, you add a “1” after the TV code to turn on Regular Limited Mode. This keeps the TV input under your control, making it easy to use your Dish Network remote2.
Easy Limited Mode: Newer remotes have Easy Limited Mode, which is simpler to set up. These remotes show a circle around the SAT button. To start Easy Limited Mode, press and hold the MODE button until all four lights light up. Then, follow certain button steps to program Limited Mode, keeping your preferred TV input2.
If you’ve set up Easy Limited Mode, remember to use the PAGE DOWN button to turn it off. Pressing PAGE DOWN gives you back full control over changing inputs on your Dish Network remote. This makes it easy to switch between different channels as you like2.
Troubleshooting Input Changing Issues on Dish Network Remote
Some users find it hard to change inputs with their Dish Network remote. If you’re having trouble, there are steps you can try.
First, make sure Limited Mode is turned off in the Remote Manager settings. This feature limits what you can do with the remote. Turning it off should let you change inputs easily.
If the problem stays, try resetting the Set-Top Box (STB). This clears out any bugs or memory issues that might be causing problems. Check your Dish Network manual or call customer support for how to reset your STB.
Another reason for input issues is not pairing the remote and TV correctly. Make sure they are paired by following the manual or contacting Dish Network support.
It’s also key to program your Dish Network remote for your TV’s functions. Look up the programming codes in the manual or on the Dish Network website. For example, use code 535 or 556 for a Roku device.
If you’ve tried everything and still can’t change inputs, call Dish Network’s customer support. They have experts who can give you more help and fix any issues.
Common Solutions for Troubleshooting Input Changing Issues:
Disable Limited Mode in the Remote Manager settings.
Reset your Set-Top Box (STB) to clear temporary bugs.
Ensure proper pairing between the remote and the TV.
Program the Dish Network remote with the correct codes for your TV.
Contact Dish Network customer support for additional assistance.
By following these steps, you can fix input changing issues on your Dish Network remote. This will help you control your entertainment again.
Statistical Data
Source
Signal strength on Dish Network should be above 70% for optimal performance.
Dish Network remote control offers a range of functions such as multi-view windows, input control on both TV and satellite, and as a universal remote for TV.
Programming the Dish Network Remote to Control Input
To program your Dish Network remote to control the input on your TV, follow these steps:
Start by removing the back cover of the remote and replacing it after removing the pull tab. (Statistical data5)
Next, press the SYS Info button on your receiver and then press the SAT button on the side of your new remote. (Statistical data5)
The remote will emit a series of beeps to indicate that the programming process is complete. (Statistical data6)
By following this process, you’ll make sure your Dish Network remote works with your TV. It will let you switch inputs easily.
Remote Control Model
52.0
Number of Beeps for Pairing
3
Number of Steps to Change Input
5
Number of Buttons on Remote Control
Various (volume, channel, input, etc.)
Type of Devices the Remote Can Pair With
AUX, TV, SAT, Blu-ray™ player, stereo, etc.
Number of Options Accessible Through Remote Control
Various (Apps, Guide, Help, etc.)
FCC Compliance
Part 15 of FCC Rules
Radio Frequency Energy Generation
Yes
Safety Instructions Provided
Detailed safety guidelines
Warning about BPA Exposure
Yes
For More Information
Visit mydish.com/support/remotes
Using Your Dish Network Remote for Voice Control
Some Dish Network remotes let you control things with your voice. This makes using your TV easier and more efficient.
To start using voice control, press and hold the voice button. This button has a microphone icon and is made for voice commands.
After pressing the voice button, follow the onscreen instructions to turn on voice control. These steps will help set up your remote for voice commands.
With voice control on, you can use your Dish Network receiver with simple voice commands. For instance, you can ask the Google Assistant to find a movie or TV show you like.
You can also use voice control to rewind, fast-forward, check the weather, or get traffic info, among other things.
Remember, voice control needs an internet connection to work with the Google Assistant. Some voice commands might also need extra smart home devices for full use.
Using your Dish Network remote with voice control makes controlling your TV easy and hands-free. It lets you quickly switch through features and functions with just your voice.
Try the future of TV control with voice-enabled Dish Network remotes. They make controlling your TV simple and convenient.
Key Features of Dish Network Remotes with Voice Control
Three beeps from the remote control indicate successful pairing with the DISH receiver.
Voice Control button allows users to speak into the remote for voice commands.
Skip Backward button allows users to skip back 10 seconds.
Skip Forward button enables users to skip forward 30 seconds.
The Touchpad can be used to navigate menus by swiping, dragging, tapping, and selecting items.
Pressing the voice button and saying the name of a movie, TV show, sport, sports team, actor, or collection activates voice commands.
The procedure to locate the remote involves pressing the Locate Remote button after hearing a series of beeps from the voice remote.
Safety instructions include warnings about keeping the device away from heat sources, avoiding liquid cleaners, and removing batteries if left unused.
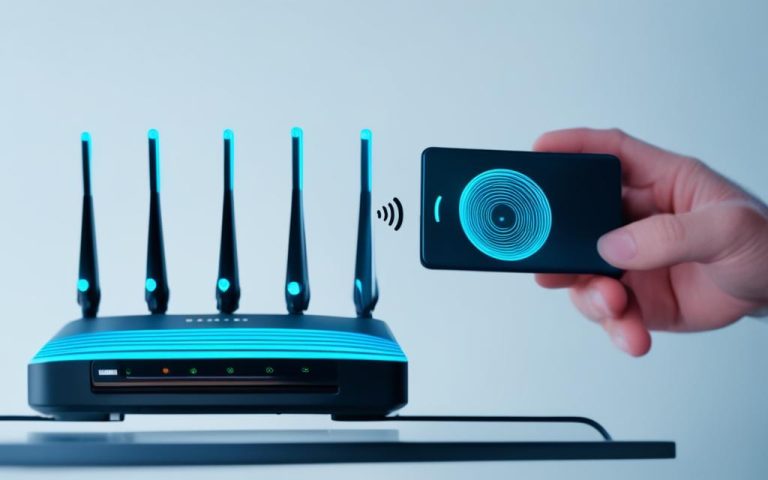
Connecting Your Dish Network Receiver to the Internet
To enjoy your Dish Network receiver fully, you need to connect it to the internet. This lets you stream online, download updates, and use various online apps.
If you want a wireless connection, here’s what to do:1
Press the home button twice on your Dish Network remote to open the settings menu.
Choose “Settings” and then “Internet”.
Go to “Wireless Setup” and select “Wi-Fi Setup Wizard”.
Follow the prompts to link your receiver to your Wi-Fi network.
For a wired connection, use an Ethernet cable to connect your receiver to your modem or router. This gives you a stable internet for your Dish Network receiver.
Once connected, you can enjoy lots of online content and services. Stream from Netflix, Amazon Prime Video, and Hulu, or play games and apps8.
An internet-connected Dish Network receiver also offers extra features. Use the Game Finder app to check games, sports data, and team updates8.
You can also manage your Dish Network account and pay bills through the My Account app on your receiver8.
If you need help connecting your receiver, call DISH Network support at 1-800-333-3474. They’re ready to help from 8 AM to Midnight ET, every day of the week9.
Exploring the Functionality of Your Dish Network Remote
Dish Network remotes do more than just change inputs. They work as a universal controller for your TV and other devices like Blu-ray players and stereos. You can easily navigate menus, control volume, and access various options with these remotes.
These remotes also have advanced features to make your viewing better. They have a light sensor to save battery life and customizable buttons for shortcuts to your favorite channels. For more details, check the user manual or visit Dish Network’s website.
Programming your Dish Network remote lets you control many devices. It includes TVs from brands like Insignia and Samsung, and Blu-ray/DVD players from Bose and Sony [source]. You can find device codes for many brands on the Dish Network website.
To use your remote fully, program it with the right codes. Press “Menu” and “Program” buttons, enter the code, and test it to see if it works [source] [source]10.
If you have problems, there are troubleshooting tips to help. Check the batteries, make sure nothing blocks the remote, and try resetting it if needed [source]10.
Exploring your Dish Network remote’s advanced features is a good idea. You can customize buttons, use voice commands, program devices, and set parental controls. These features make using your remote more convenient and efficient [source]10.
Take good care of your Dish Network remote to make it last longer. Don’t put it near heat and clean it with a damp cloth [source]11. It meets FCC rules for safety and reliability [source]11.
If you have questions about your Dish Network remote, visit mydish.com/support/products/remotes/20hx or call 1.800.333.DISH (3474) [source]12.
Programming Your Dish Network Remote to Control Your TV
To make the most of your Dish Network remote, you need to program it. Here are easy steps to program your remote for your TV.
Press the home button twice on the remote.
Select Settings, then navigate to Remote Control.
From there, select TV and TV Pairing Wizard to start the programming13.
Follow the onscreen prompts to finish the pairing.
After programming, you can easily control your TV with the Dish Network remote. You can adjust the volume or change channels without trouble.
If your TV doesn’t respond to the volume buttons, it might not be programmed right.
“My TV wouldn’t respond to the volume control on the Dish Network remote, but after programming it properly, the issue was resolved.” – Dish Network user1
If you have trouble programming or if the issue continues, check your Dish Network user manual. You can also contact Dish Network’s support for help.
With your Dish Network remote set up for your TV, managing both devices will be easy. This will improve your entertainment experience.
Regulatory Information and Safety Instructions
When using your Dish Network remote, it’s key to know the rules and safety tips from Dish Network. These help you use your remote safely and make your experience better.
The rules warn about the risks of the product. They stress the need for caution and awareness. The State of California says the product might expose users to Bisphenol A (BPA), which can harm reproduction or cause birth defects6.
The remote meets FCC Rules Part 15 standards614. It also follows Class B digital device rules from the FCC614. This ensures it works well and doesn’t disturb other devices15.
Dish Network’s safety tips focus on keeping you safe. They tell you not to put the remote near heat to avoid damage or problems61514. They also suggest not using liquids or harsh cleaners on it615. Taking out the batteries when not using the remote helps keep it safe and makes the batteries last longer614.
If you’re having trouble with your remote, talk to a dealer or a skilled radio/TV expert6. Remember, changing your remote could affect its use6. For more info on warranty, safety, and rules, check out mydish.com/support/remotes6.
Regulatory Information and Safety Instructions
The rules warn about the risks of the product. They stress the need for caution and awareness. The State of California says the product might expose users to Bisphenol A (BPA), which can harm reproduction or cause birth defects6.
The remote meets FCC Rules Part 15 standards614. It also follows Class B digital device rules from the FCC614. This ensures it works well and doesn’t disturb other devices15.
Dish Network’s safety tips focus on keeping you safe. They tell you not to put the remote near heat to avoid damage or problems61514. They also suggest not using liquids or harsh cleaners on it615. Taking out the batteries when not using the remote helps keep it safe and makes the batteries last longer614.
If you’re having trouble with your remote, talk to a dealer or a skilled radio/TV expert6. Remember, changing your remote could affect its use6. For more info on warranty, safety, and rules, check out mydish.com/support/remotes6.
Need Help with Your Dish Network Remote?
If you need help with your Dish Network remote, we’ve got you covered. Just press and hold the Info/Help button on your remote to get support and assistance11. You’ll find everything from warranty info to safety tips and more. We aim for a smooth remote control experience for you.
For detailed support, check out our website at mydish.com/support/remotes. There, you’ll find troubleshooting guides, FAQs, and a customer forum to connect with other users11. We know each remote issue is different, so our site offers lots of info for your needs.
At Dish Network, we aim for easy remote control use. Our website is packed with help for troubleshooting, programming, and understanding your remote’s features. It’s designed to be easy to use and informative, so you can quickly find the answers you need.
Your remote controls your entertainment. It should be simple, dependable, and easy to use. If you run into problems or have questions, we’re here to help. Check our website, use the Info/Help button on your remote, and let us help you enjoy your Dish Network remote fully.
Conclusion
Changing the input on a Dish Network remote is easy if you know the right steps. You might need to disable Limited Mode, use the TV button, program the remote, or connect it to the internet. Dish Network’s safety instructions give you all the details you need for a smooth experience.
These steps help users easily explore and use their Dish Network remote’s features. This makes watching TV more convenient. The safety tips in Dish Network’s guides also teach how to avoid electrical shock or damage to your equipment.
On sites like AVSForum, people share their experiences with HDMI switching. This feedback and data16 show the need to think about brand and setup when using advanced features.
Using tips and advice from the Dish Network community can make your remote work better. This ensures you get the most out of your entertainment.
FAQ
How can I change the input on my Dish Network remote?
To change the input on your Dish Network remote, just follow these steps:
What is Limited Mode on a Dish Network remote?
Limited Mode on Dish Network remotes stops the TV input from being changed. It’s for those who want to keep the TV input set to DISH. This way, the DISH receiver controls what’s shown on the screen.
What should I do if I am having trouble changing inputs with my Dish Network remote?
If changing inputs with your Dish Network remote is hard, try these solutions:
How do I program my Dish Network remote to control the input on my TV?
To program your Dish Network remote, follow these steps:
Can I use voice control with my Dish Network remote?
Yes, some Dish Network remotes have voice control. To turn it on, just follow these steps:
How can I connect my Dish Network receiver to the internet?
To connect your Dish Network receiver to the internet, do this:
What other functionalities does a Dish Network remote offer?
A Dish Network remote does more than change inputs. It also offers:
How do I program my Dish Network remote to control my TV?
To program your Dish Network remote, follow these steps:
Are there any regulatory information and safety instructions for Dish Network remotes?
Dish Network provides rules and safety tips for their remotes. These cover:
Where can I find help with my Dish Network remote?
If you need help with your Dish Network remote, check out these resources:
C Spire Wireless is a top company that offers wireless and internet services. Sometimes, network problems can happen, causing frustration. If you’re having trouble with C Spire, don’t worry! There…
Casting Networks is a key platform for actors aiming to boost their careers. This guide will walk you through adding representation on Casting Networks. It covers step-by-step instructions and key…
Finding the IP addresses of your network devices is essential for fixing network or internet problems. Most devices come with a default IP address. It’s important to know the IP…
The Internet began with the first computer in 1936 and the first link between computers in 1969. Now, we use many types of networks for different needs. This article will…
The Mountain West Network on DirecTV lets sports fans watch exciting games from the Mountain West Conference. Whether you love football, basketball, or other college sports, this network has it…
To change the network on a cloud edge device, start by turning on the camera. Make sure it’s close to your WiFi network. Then, use a mobile app or web…