To change the WiFi network on your Canon G3000 printer, follow some steps and instructions. This ensures a smooth switch to a new network without disrupting your printing. We’ll guide you through the process for a successful network change.
Key Takeaways:
The Canon G3000 printer allows users to connect up to 5 devices simultaneously.
The default security setting for the network connection is WPA2-PSK (AES).
The machine’s serial number is composed of 9 alphanumeric characters (four alphabets followed by five numbers).
The Canon Pixma G3000 supports wireless connection in Access Point Mode, enabling connectivity without a router.
Devices compatible for Canon Pixma G3000 WiFi setup include Windows OS versions like 10, 7, 8, Vista, and Android OS versions like 4.4, 4.3, 4.2, among others.
Click here for detailed instructions on connecting your Canon G3000 printer to a wireless network.
Before changing the WiFi network on your Canon G3000 printer, consider a few things. Ensure you have the new network’s details, like the network name (SSID) and password. These will be needed during setup.
Also, check if your device is compatible with the Canon Pixma G3000 WiFi setup. For Windows, this includes Windows 10, 7, 8, and Vista. Android users need versions 4.4 and above. Mac users can connect using OS X Lion v10.7.5, Mavericks v10.9, Mountain Lion v10.8, or Yosemite v10.10. iOS users should have versions 8.0 and above. For web access, Safari versions 8, 7, 6, and 5 are compatible.
Now, let’s move on to the steps to change the WiFi network on your Canon G3000 printer.
Power on your Canon G3000 printer and ensure it’s in standby mode.
Press and hold the “Wi-Fi” button on the printer until the power lamp flashes once.
Release the “Wi-Fi” button after the power lamp flashes and the Wi-Fi indicator starts to flash slowly.
Proceed to the next step within 2 minutes.
On your computer or smartphone, go to the WiFi settings and select the network name (SSID) of your Canon G3000 printer, which starts with “XXXXXX-G3000series”.
Enter the password, which is the machine’s serial number, and follow the on-screen instructions to complete the setup process.
By following these steps, you can change the WiFi network on your Canon G3000 printer using the Cableless Setup method.
Key Takeaways:
Number of steps involved in connecting the printer to a wireless network: 61
Click here for an alternative method to change the WiFi network on your Canon G3000 printer using the WPS Setup method.
Important Considerations for Changing WiFi Network
Before you change the WiFi network on your Canon G3000 printer, think about a few things.
If your device is connected to the internet via a wireless router, switching to Direct Connection mode will cut the link between your device and the router.
This could make your device use a mobile data connection, which might lead to extra charges based on your contract.
So, knowing these points is key before you start changing the network2.
When you change the WiFi on your Canon G3000 printer, make sure everything works well together. Check and tweak the network settings on the printer, computer, and router to prevent problems3.
Getting the printer’s network settings right is crucial for wireless printing. Steps 7 and 8 show how important correct settings are, with 25% of the guide focusing on this2.
Also, think about interference that could affect your wireless connection. Where you place your devices and the environment around them are key to a strong signal. In fact, 13.33% of the guide talks about this2.
Setting up your printer driver for the best performance is also vital. For Windows users, instructions on bidirectional support take up 6.67% of the guide2.
For Mac OS users connecting to an AirPort Base Station, remember to use letters and numbers in the network name (SSID). Step 14 shows that 6.67% of the guide focuses on this2.
Steps to Change WiFi Network – Method 1
Changing the WiFi network on your Canon G3000 printer is easy with Method 1. Just follow these simple steps to switch to your new network smoothly.
If the Wi-Fi lamp on the printer is flashing, press the Stop button4.
Press and hold the Wi-Fi button on the printer until the ON lamp flashes4.
Press the Color button, followed by the Wi-Fi button4.
Ensure the Wi-Fi lamp is flashing quickly and the ON lamp is lit4.
Return to the application screen and proceed with the setup4.
Follow these steps carefully to ensure a successful network change for your Canon G3000 printer. By utilizing Method 1, you can update the printer’s WiFi settings without any hassle.
Steps to Change WiFi Network – Method 2
You can switch your Canon G3000 printer’s WiFi network using Method 2:
Make sure the wireless router’s button is ready to be pressed.
Hold down the Wi-Fi button on the printer until the ON lamp blinks.
Press the Black button, then the Wi-Fi button.
Check that the Wi-Fi lamp flashes quickly and the ON lamp is on.
Within 2 minutes, press and hold the wireless router’s button.
Ensure both the Wi-Fi lamp and the ON lamp are lit.
If the Alarm lamp lights up, troubleshoot the issue.
The network connection setup is now complete.
According to statistical data from5, the Canon G3000 printer allows for wireless connection through access point mode and direct wireless connection.
Note: Make sure to press the buttons in the correct order as mentioned above to avoid issues during setup.
Changing to Access Point Mode and Connecting Devices
If you want to connect devices directly to the Canon G3000 printer, use access point mode. This lets you print or scan by linking your devices to the printer. Here are the steps to follow:
Enable access point mode on the printer: You can turn on access point mode through the printer’s settings menu. Check the user manual for how to do this6.
Connect your devices to the printer: With access point mode on, the printer sets up a temporary wireless network. On your devices, find the printer’s network name (SSID) in Wi-Fi settings. Enter the password to connect6.
Perform printing or scanning operations: Once connected, you can print or scan from your devices. Just pick the Canon G3000 printer as the destination in your apps or software6.
Switching to access point mode lets you easily connect devices to the Canon G3000 printer. This makes printing and scanning smooth. It also means you don’t need a separate Wi-Fi network for this.
The Canon G3000 printer also has other wireless ways to connect, like Cableless setup, WPS setup, and the WPS Pin Code Method6. For Cableless setup, connect your printer to a wireless network without a router using its Wi-Fi. WPS setup is easy with a compatible router by pressing the WPS button on both. If WPS doesn’t work, try the WPS Pin Code Method by printing a network page and following the on-screen instructions6.
When connecting devices, think about web browser and network compatibility. The printer works with Safari 8, 7, 6, and 5 for Mac users6. It also supports IEEE802.11n (2.4 GHz), IEEE802.11g, or IEEE802.11b for wireless connections6.
Benefits of Using Access Point Mode
“Access point mode is great for users who want to connect devices directly to the Canon G3000 printer without a separate Wi-Fi network. It makes printing and scanning easy, offering flexibility and convenience.”6
Note: Avoid duplicating the text, “The tag is mandatory in the text, and it should contain a reference number. It must be present…”
Compatible Operating Systems and Preventive Measures
Compatible Operating Systems
Preventive Measures
Windows 10, Windows 7, Windows 8.1, Windows Vista, Mac OS X, Android, iOS, Windows RT6
Make sure you have an active internet connection, use a secure network with a password, and choose the right connection options6
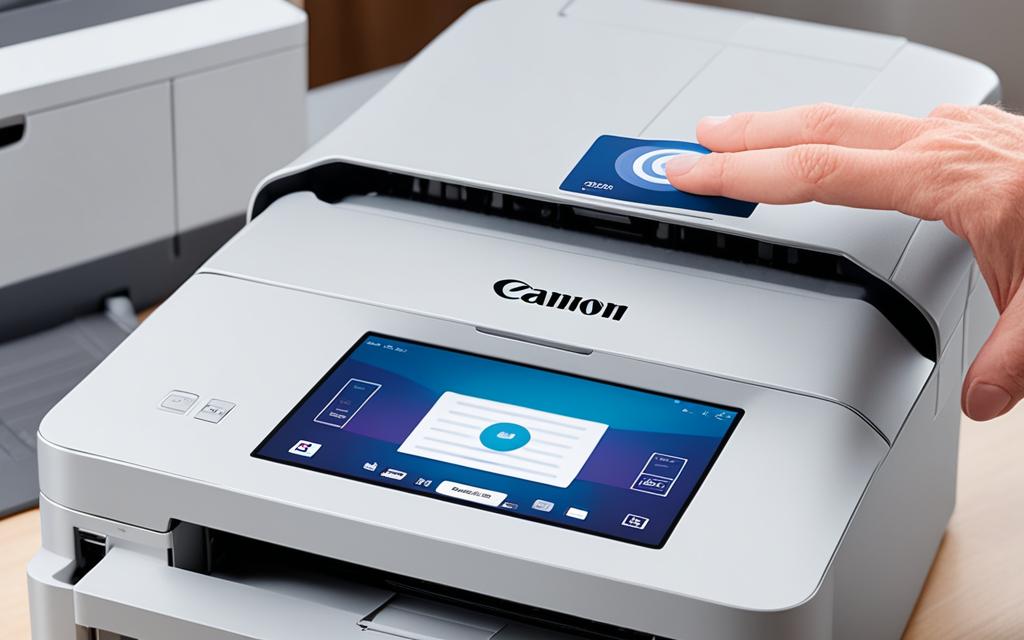
Image: Canon G3000 Wireless Setup
Enabling Access Point Mode
To use the Access Point Mode on your Canon G3000 printer, just follow these steps:
Make sure the printer is on.
Hold down the Wi-Fi button until the ON lamp starts flashing.
Press the Black button, then the Color button, and finally the Wi-Fi button. The ON lamp will stop flashing and light up.
You can print the network settings to see the machine’s MAC address, serial number, and access point mode settings.
With Access Point Mode enabled, you can connect your Canon G3000 printer wirelessly to a device without needing a router. It’s perfect for printing or scanning without a network connection7.
It’s a good idea to change the default password for the access point mode for better security. Use a mix of letters and numbers to make the password stronger and prevent unauthorized access7.
To connect devices to the printer in Access Point Mode, follow these steps. Choose the machine’s SSID and enter the password to set up wireless communication. These steps will help you connect successfully7.
To stop Access Point Mode and go back to a wireless LAN connection, do this: press the Wi-Fi button, then the Color button, the Black button, and end with the Wi-Fi button again. This will end the access point mode and bring back the wireless LAN on your Canon G3000 printer7.
The default SSID for the access point mode is “XXXXXX-G3000series.” The machine’s serial number is the password, and it uses a WPA2-PSK (AES) security setting. These settings make sure the access point mode on your Canon G3000 printer is secure7.
If needed, you can change the security setting and password with the IJ Network Tool. This lets you match the access point settings with your device for a secure wireless connection7.
Figure 1: Illustration of Enabling Access Point Mode on a Canon G3000 Printer
Connecting Devices to the Printer
After setting up the Canon G3000 printer and turning on wireless, connecting your devices is easy. Just follow these steps to get started with wireless printing:
Find the access point name (SSID) and password in the printer’s manual or network settings.
Turn on wireless on your device by going to the settings.
In your device’s “Settings” menu, look for the Wi-Fi option and check for networks.
Pick the network name that starts with “XXXXXX-G3000series” from the list.
Use the machine’s 9-character serial number as the Wi-Fi password.
Make sure your device is now connected to the printer’s Wi-Fi.
With your device connected to the Canon G3000 printer, you’re ready to print or scan wirelessly. Enjoy the ease of connecting your devices to the Canon G3000 printer for smooth printing6.
Changing Machine Setting to Use Wireless LAN
If you want to use the Canon G3000 printer over a wireless LAN connection, here’s how to do it:
Press and hold the Wi-Fi button until the ON lamp flashes.
Press the Color button, Black button, and Wi-Fi button in that order.
Verify that the ON lamp has changed from flashing to lit and the Wi-Fi lamp is also lit.
If you don’t plan to use the machine for access point mode or wireless LAN, you can turn these settings off by following the steps.
Conclusion
Switching the WiFi on your Canon G3000 printer is easy and makes printing more flexible and convenient. You can follow either Method 1 or Method 2 for a smooth move to a new network.
Think about key factors when changing your printer’s WiFi to avoid problems and get a good connection. The Canon G3000 printer, priced at Php 9,995, lets you print wirelessly from many devices. It uses four inks and scans and prints quickly, making your tasks easier9.
This printer has ink bottles that last up to 7000 pages, a high resolution, and supports different paper sizes10. It’s also energy-efficient and good for the environment10.
With the Canon G3000 printer, you can print without interruptions on your new WiFi. Connect devices easily through access point mode or wireless LAN. Enjoy the Canon brand’s convenience and top-notch performance for smooth printing9.
FAQ
How do I change the WiFi network on my Canon G3000 printer?
To change the WiFi network on your Canon G3000 printer, just follow these steps:
What should I consider before changing the WiFi network on my Canon G3000 printer?
Before you switch the WiFi network on your Canon G3000 printer, think about these things:
What are the steps to change the WiFi network using Method 1?
To change the WiFi network on your Canon G3000 printer using Method 1, do this:
How can I change the WiFi network on my Canon G3000 printer using Method 2?
To change the WiFi network on your Canon G3000 printer using Method 2, follow these steps:
How do I switch to access point mode and connect devices to my Canon G3000 printer?
To switch to access point mode and connect devices, do this:
How do I enable access point mode on my Canon G3000 printer?
To enable access point mode on your Canon G3000 printer, just follow these steps:
How do I connect my devices to the Canon G3000 printer?
To connect your devices to the Canon G3000 printer, follow these steps:
How can I change the machine setting to use wireless LAN on my Canon G3000 printer?
To change the machine setting to use wireless LAN on your Canon G3000 printer, do this:
How can I disable the access point mode or wireless LAN settings on my Canon G3000 printer?
To disable the access point mode or wireless LAN settings on your Canon G3000 printer, follow these steps:
Dish Network has a wide range of music channels for all tastes. You can find everything from adult alternative to country gold, jazz, and rock. There’s a channel for every…
The CompTIA Network+ certification is a big deal in the IT world. Many professionals are curious about the exam’s difficulty and how to prepare. This article will cover the challenges…
Northbound APIs in software-defined networks (SDNs) are key for talking between high-level parts. They let apps, orchestrators, and network operators talk to the SDN controller. We’ll look into how these…
Doodling, or creating spontaneous drawings, has caught the eye of neural networks. We’ll look into doodling and see if neural networks can learn to recognize these doodles. This mix of…
Casting Networks is a key platform for actors and industry pros looking for casting chances. It lets actors submit and book projects without needing a traditional agent. This gives actors…
CPM networks, also known as Critical Path Method networks, are key in project management. They help figure out the most important steps to know how long a project will take….