Easy Guide: how to setup netbird to access home network
By
NetBird is revolutionizing the way we access our home networks by providing a modern mesh VPN solution that simplifies secure network access across different locations and devices.
Unlike traditional VPNs, NetBird eliminates the need for static IP addresses or port forwarding, creating an overlay network where machines connect directly peer-to-peer over encrypted tunnels.
This comprehensive guide will walk you through the process of setting up NetBird to securely access your home network from anywhere in the world, exploring its key benefits, including easy setup, enhanced security, and peer-to-peer connections.
By the end of this tutorial, you’ll have a fully functional NetBird setup that provides seamless and secure access to your network resources.
NetBird is revolutionizing home network access with its modern mesh VPN solution. It creates secure, encrypted connections between all your devices, allowing you to access your home network resources from anywhere.
NetBird simplifies the setup process significantly by establishing direct peer-to-peer connections between devices, unlike traditional VPNs that require complex configuration, port forwarding, and static IP addresses.
Key Benefits of NetBird for Home Networks
NetBird offers several key benefits for home networks, including zero configuration NAT traversal, a generous free tier that allows up to 5 users and 100 machines, and the ability to self-host for complete control over your network infrastructure.
Key advantages include: Easy setup, no firewall fuss, Docker-friendly deployment, and enhanced security through access policies.
How NetBird Differs from Traditional VPNs
Unlike traditional VPNs that rely on a central server, creating a bottleneck, NetBird establishes direct connections between devices when possible, improving performance. This approach also enhances security by reducing the attack surface.
Additionally, NetBird supports SSO login with popular identity providers, making it easy to manage user access to your home network.
Prerequisites for Setting Up NetBird
Setting up NetBird requires some initial preparation to ensure a smooth installation process. Before you begin, it’s essential to understand the prerequisites that will enable you to successfully configure NetBird for accessing your home network.
System Requirements
NetBird is highly versatile and supports a wide range of platforms, including Windows, macOS, Linux, iOS, Android, Docker containers, routers, and even serverless environments. To use NetBird, your devices must meet the minimum system requirements for running the NetBird client software. For instance, this tutorial uses a MacBook and an EC2 node running Linux on AWS, demonstrating NetBird’s compatibility with various systems.
Required Accounts and Permissions
To set up NetBird, you’ll need to create a NetBird account, which can be done through their website or during the initial setup process using SSO login options with Google, Microsoft, or GitHub accounts. Additionally, administrator privileges are required on the devices where you’ll be installing NetBird, as the software needs to create and configure virtual network interfaces.
Network Considerations
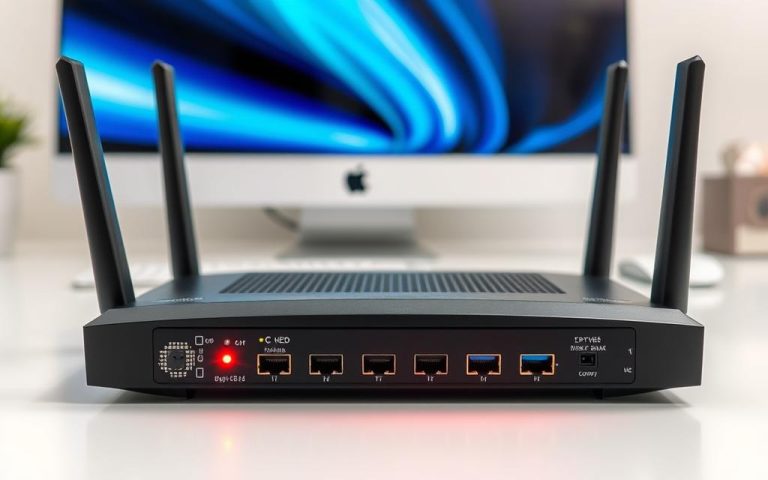
Consider your home network topology before installation, including identifying which devices will need to be accessible remotely and whether you’ll need to set up subnet routing for entire network segments. Ensure your internet connection is stable and that your router doesn’t have restrictive firewall rules that might interfere with NetBird’s operation. For optimal security, plan your access control policies in advance.
Check if your devices meet the minimum system requirements.
Create a NetBird account and ensure you have administrator privileges.
Plan your network configuration and access control policies.
By fulfilling these prerequisites, you’ll be well-prepared to set up NetBird and enjoy secure, remote access to your home network.
The process of setting up NetBird for home network access involves a few key steps that we’ll outline. To get started, you’ll need to install the NetBird client on your primary device, which could be your laptop, desktop computer, or smartphone.
Installing NetBird on Your Primary Device
Installation is straightforward across different platforms. On Windows and macOS, you can download and run the installer from the NetBird website. Linux users can use the provided installation script by running curl -fsSL https://pkgs.netbird.io/install.sh | sh in their terminal.
After installation, you’ll find the NetBird application in your system tray or applications list. Alternatively, power users can use the command line interface with the “netbird up” command to initiate the connection process.
Creating Your NetBird Account
When you first launch NetBird, it will prompt you to create or sign in to your NetBird account through an interactive SSO login session in your browser. This process supports authentication through Google, Microsoft, GitHub, or email, making it convenient to get started.
The account creation process is simple and requires basic information. Once completed, your browser will confirm the device registration and return you to the NetBird application.
Connecting Your First Device to NetBird
Upon successful authentication, the NetBird icon will change color, typically to orange or green, indicating that your device is now registered and connected to your NetBird network.
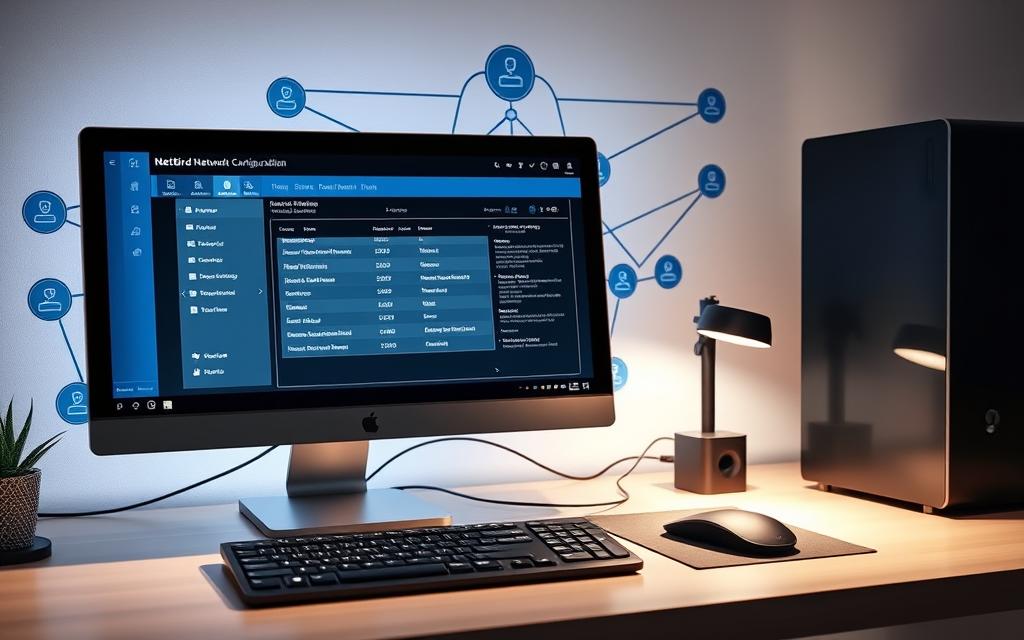
You can verify the connection by checking the NetBird dashboard in your browser, which will show your device listed in the Peers view with its assigned private IP address and connection status. This initial setup establishes your primary device as the first node in your NetBird network.
By following these steps, you’ll have successfully set up NetBird on your primary device, creating a secure and private network that you can expand to other devices in your home network.
Adding Home Network Devices to NetBird
Integrating all your home network devices with NetBird enhances your remote access experience. After setting up your primary device, you’ll want to add other home network devices to your NetBird network, including servers, NAS devices, smart home hubs, and other systems you wish to access remotely.
Creating and Using Setup Keys
For devices without a user interface, such as servers or Docker containers, NetBird provides setup keys – a secure method to authenticate and add these devices to your network without requiring interactive login. To create a setup key, log into your NetBird dashboard, navigate to the Setup Keys section, click “Create Setup Key,” provide a descriptive name, set an optional expiration date, and click Create.
The generated setup key is a long string that you’ll use to authenticate devices. It’s crucial to copy this key securely as it provides access to your network. You can then use this key with the command: “netbird up –setup-key YOUR_SETUP_KEY” to connect your device.
Device Type
Setup Method
Security Consideration
Servers, Raspberry Pi
Using Setup Key
Secure authentication without interactive login
Docker Containers
Passing Setup Key as Environment Variable
Ensure secure key management
Installing NetBird on Home Servers
When installing NetBird on a home server, you’ll use the same installation method as your primary device, but instead of the interactive login, you’ll use the command: “netbird up –setup-key YOUR_SETUP_KEY”. This ensures that your servers are securely connected to your NetBird network.
Adding Network Devices Without User Interface
For network devices that can’t run the NetBird client directly, such as certain IoT devices, you can set up a NetBird gateway on your network that will route traffic to these devices. This allows for comprehensive network access while maintaining security.
After adding a device using a setup key, verify its connection by checking the Peers section in your NetBird dashboard – the new device should appear with its assigned IP address and connection status. You can organize your devices into groups within the NetBird dashboard for easier management and more granular access control policies.
Configuring NetBird for Optimal Home Network Access
For a secure and efficient home network, optimizing your NetBird setup is vital. Once you’ve added your devices to NetBird, configuring the settings will ensure seamless and secure access to your home network resources from anywhere.
Setting Up Network Routes
Setting up network routes in NetBird allows you to access entire subnets through a designated gateway peer. To configure a network route, navigate to the Routes section in your NetBird dashboard, click “Add Route,” specify the subnet, and select which NetBird peer will act as the gateway. For redundancy, you can assign multiple peers as gateways for the same route, and NetBird will automatically handle failover and load balancing between them.
Configuring DNS Settings
DNS configuration is crucial for a user-friendly experience. NetBird’s built-in DNS management allows you to assign a custom domain suffix to your network and automatically resolve peer names. You can also set up DNS forwarding rules to resolve specific domains through your home network’s DNS servers.
Creating Access Policies for Home Network
Creating access policies is essential for security. In the NetBird dashboard, navigate to the Access Control section to define which peers or groups can communicate with each other and on which ports. Consider implementing the principle of least privilege by only allowing the specific types of traffic needed between devices.
Configuration Aspect
Description
Benefits
Network Routes
Access entire subnets through a gateway peer
Enhanced accessibility and redundancy
DNS Settings
Assign custom domain suffix and resolve peer names
User-friendly experience and simplified access
Access Policies
Define communication rules between peers or groups
Improved security and controlled access
Testing Your NetBird Connection to Home Network
After configuring NetBird, thorough testing is crucial to ensure reliable access to home network resources. This step is vital to verify that all devices are connected correctly and that the network is functioning as expected.
Verifying Peer Connections
Start by verifying peer connections in the NetBird dashboard. All devices should show as “Connected” with green status indicators and display their assigned NetBird IP addresses. You can also use the command line to verify connections using the “netbird status” command, which provides detailed information about connected peers.
Testing Access to Home Network Resources
Test basic connectivity by pinging other devices in your NetBird network using their NetBird IP addresses or DNS names. For devices acting as gateways, test access to other local network devices without NetBird installed. Try accessing specific services on your home network, such as your router’s web interface or NAS, using their local addresses through the NetBird connection.
Troubleshooting Common Connection Issues
If you encounter connection issues, first check that all devices are connected in the dashboard and verify that access policies allow the specific traffic you’re attempting. Common troubleshooting steps include restarting the NetBird service, checking firewall rules, and ensuring network routes are correctly configured. For persistent issues, check NetBird’s detailed logs to identify the problem.
By following these steps, you can ensure a secure and reliable connection to your home network using NetBird. As NetBird’s documentation states, “You now have a secure peer-to-peer WireGuard connection between two machines,” emphasizing the security and reliability of the connection.
Advanced NetBird Features for Home Networks
NetBird offers several advanced features that can significantly improve your home network’s security and accessibility. These features are designed to enhance the overall functionality of your network, providing a more secure and efficient experience.
Setting Up Secure Remote Desktop Access
With NetBird, you can set up secure remote desktop access to control your home computers from anywhere without exposing RDP or VNC ports to the internet. Simply connect to your NetBird network and access your machines using their private NetBird IP addresses. For enhanced security, implement NetBird access policies to restrict RDP/VNC traffic to specific authorized devices.
Integrating Docker Containers with NetBird
NetBird seamlessly integrates with Docker containers, allowing you to connect containerized applications to your NetBird network. This is particularly useful for self-hosted services running in Docker on your home server. You can install the NetBird client inside the container or use Docker Compose to share the host’s NetBird network interface.
Self-Hosting NetBird Control Plane
For complete control over your NetBird deployment, you can self-host the NetBird control plane. This involves setting up several components, including the management API, web UI, and identity provider. NetBird provides documentation and scripts to deploy these components using Docker or on virtual machines, keeping all management traffic within your own infrastructure.
Feature
Description
Benefit
Secure Remote Desktop Access
Access home computers remotely without exposing RDP/VNC ports
Enhanced security and control
Docker Container Integration
Connect containerized applications to NetBird network
Simplified management of self-hosted services
Self-Hosting Control Plane
Host NetBird control plane on your own infrastructure
Complete control over management traffic
Conclusion: Enjoying Secure Access to Your Home Network
With NetBird successfully set up, you can now enjoy secure and reliable access to your home network from anywhere in the world. By following this guide, you’ve established a modern mesh VPN solution that connects all your devices directly through encrypted peer-to-peer tunnels, eliminating the complexity of traditional VPNs.
Your NetBird setup offers significant advantages, including no port forwarding required, automatic NAT traversal, and direct connections between devices for optimal performance. You’ve also ensured that only authorized devices can communicate with specific resources, implementing proper security boundaries within your network.
As your home network evolves, you can easily manage your setup through the intuitive NetBird dashboard. For more information on NetBird’s capabilities, visit ITProTutorials. With NetBird, you’re not only gaining secure access but also joining an open-source community that is actively developed and improved.
FAQ
What is the primary purpose of using NetBird for home network access?
The primary purpose of using NetBird is to provide secure, remote access to your home network, allowing you to connect your devices and access resources as if you were directly connected to the network.
How do I generate a setup key in NetBird?
To generate a setup key in NetBird, log in to your NetBird dashboard, navigate to the “Setup Keys” section, and click on “Create Setup Key.” You can then choose the type of key and its expiration date.
Can I use NetBird to connect devices without a user interface?
Yes, NetBird allows you to connect devices without a user interface, such as servers or IoT devices, using setup keys. This enables you to integrate these devices into your NetBird network.
What are the system requirements for installing NetBird on my device?
The system requirements for NetBird may vary depending on the device and operating system. Generally, NetBird supports most modern operating systems, including Windows, macOS, and Linux.
How do I troubleshoot common connection issues with NetBird?
To troubleshoot connection issues with NetBird, check your internet connection, verify your setup key or login credentials, and ensure that your device’s firewall is not blocking the connection. You can also check the NetBird dashboard for error messages.
Can I integrate Docker containers with NetBird?
Yes, NetBird supports integrating Docker containers into your network. This allows you to connect your containerized applications to your NetBird network, enabling secure access to these resources.
What is the difference between NetBird and traditional VPNs?
NetBird differs from traditional VPNs in its ease of use, scalability, and flexibility. NetBird provides a more straightforward setup process and allows for more granular control over network access and security policies.
How do I configure DNS settings in NetBird?
To configure DNS settings in NetBird, navigate to your NetBird dashboard, go to the “DNS” section, and enter your desired DNS server addresses. You can also configure DNS settings for specific devices or networks.
Computer networks have transformed how organisations communicate and share resources. They’ve revolutionised business operations in the digital age. Companies report a 30% boost in team communication through advanced networking technologies1. Computer networks streamline operations and boost productivity. Businesses can cut costs by 25% through efficient resource sharing. This includes centralised printer and scanner access1. Remote…
Network security is crucial for businesses worldwide. The digital landscape is evolving rapidly, increasing the risk of cyberattacks. Protecting sensitive data and maintaining robust digital infrastructure is essential. Data breaches are becoming costlier. In 2023, the average global cost reached $4.45 million. This represents a 15% increase over three years, highlighting the need for better…
Many PS5 users are experiencing frustrating connection drops after just a few minutes of use, requiring constant reconnection. This issue appears to be specific to the PS5, as other devices in the same household typically maintain stable connections. Common error codes include NW-102265-6, indicating a network connectivity problem. Unlike other devices, the PS5 seems particularly…
Network connectivity is vital for modern computing. A wireless network adapter lets your computer connect to Wi-Fi networks. This turns your device into a powerful communication tool. Most modern computers come with built-in wireless adapters. About 85% of laptops have integrated Wi-Fi cards. For desktop computers, 70-80% include internal wireless adapters. However, 15% of users…
Modern computer networks rely on efficient error-control methods to ensure smooth data transmission. Among these, selective repeat stands out as a powerful sliding window protocol. It enhances reliability by resending only lost or corrupted frames, saving bandwidth and time. Operating at the data link layer, this method outperforms alternatives like Go-Back-N. Unlike traditional approaches, it…
Public Wi-Fi hotspots offer convenience but come with serious security risks. Cybercriminals often target these networks to intercept sensitive data, including passwords and financial details. The FBI warns that even hotel Wi-Fi can be vulnerable to attacks. Without proper protection, your personal information could be exposed. Hackers use techniques like man-in-the-middle attacks to steal credentials….